Workflows
Workflows allow you to automate actions in Hello, such as assigning tickets to the right team/agent/bot or sending an auto-reply when certain conditions are met. With workflows, you can automate repetitive tasks, respond instantly, and ensure tickets always reach the right place. They are composed of conditions (what you’re looking for) and actions (what you want to make happen).
🔧 Steps to Set Up a Workflow
Navigate to Manage Section
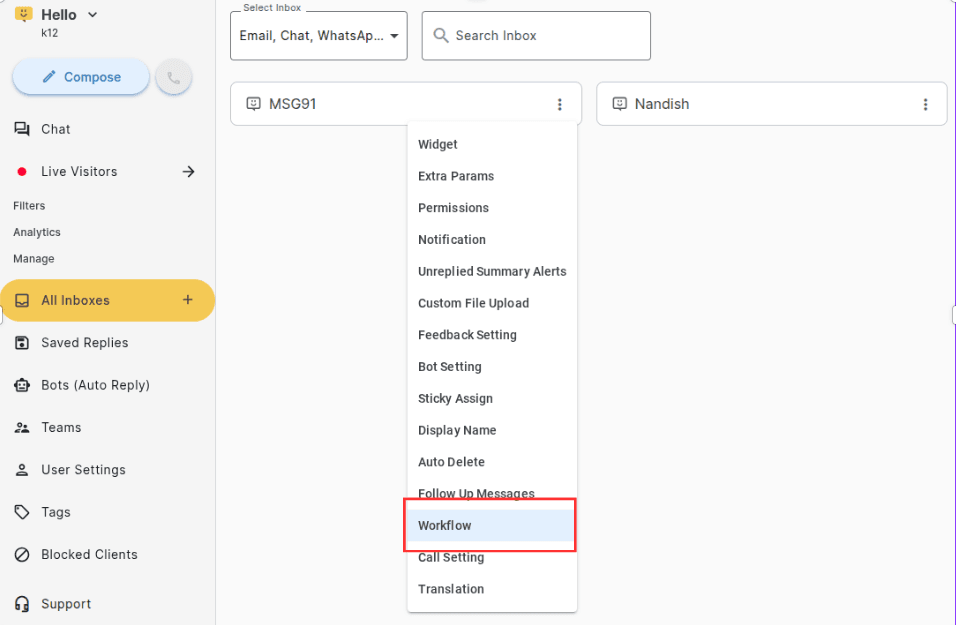
Go to All Inboxes under the Manage section.
_compressed.png)
Select a Channel
Find the channel where you want to add a workflow.
Click on the three dots (⋮) next to the channel name.
Select Workflow.

Create a Workflow
On the top right corner, click Create Workflow.
 (1)_compressed.png)
Set the Conditions (IF section)
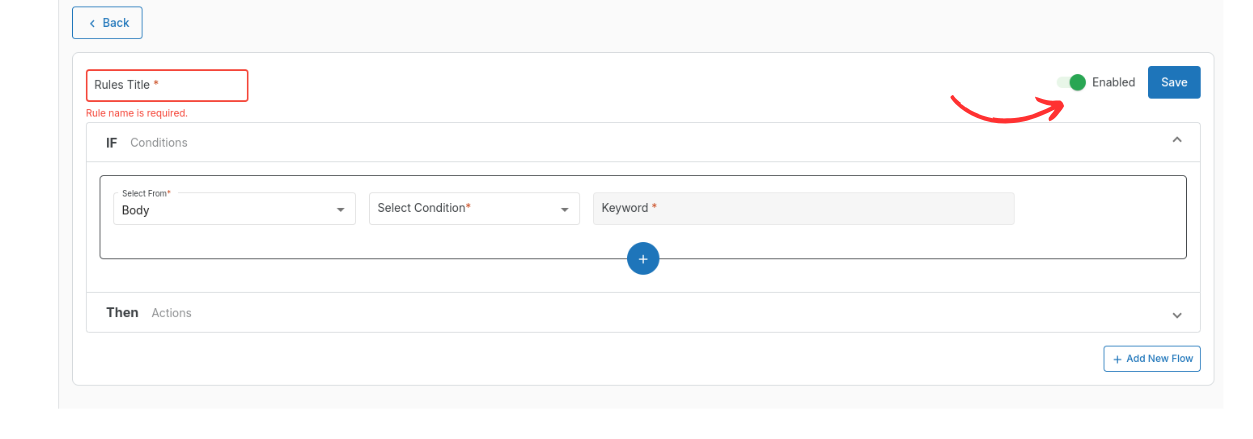
Define the condition that will trigger the workflow.
If the message body contains, does not contain any keyword or has any value, for example the message contains keywords like help, urgent, and support.
If a phone number equals to, starts with, or ends with a mobile number, such as number of an important client or a customer
If the message inbound time is in between a time duration for example one can set if a message is received during non-working hours.
Set multiple conditions with “OR” and “AND” combinations.
 (1)_compressed.png)
Define the Action (THEN section)
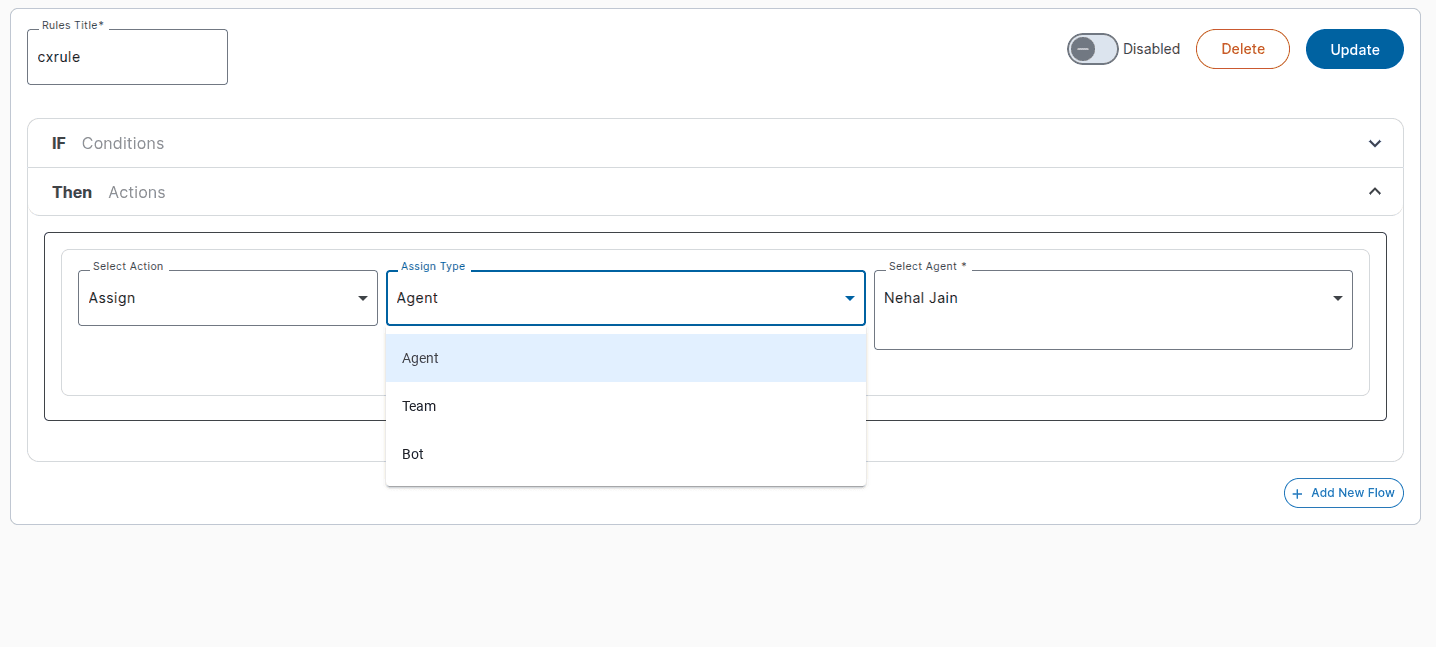
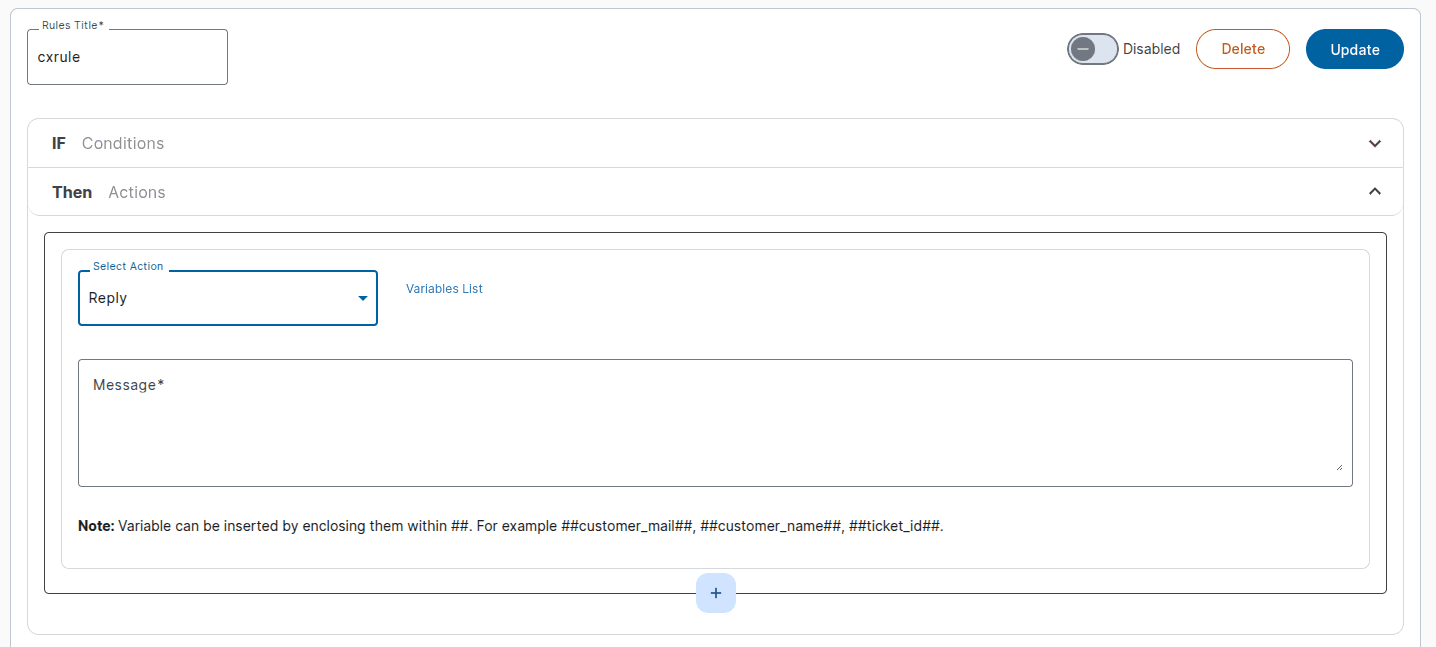
Choose what happens when the condition is true.
Assign the ticket to a team, agent or Chat bot

Or choose to send an automated quick reply.

Example:
Assign the ticket to the Support Team.
Send an auto-reply acknowledging the message.
Save & Activate
Review your workflow.
Click Save to activate it.
One can enable or disable the flow by turning the toggle on present at the top right corner of the page next to ENABLE.

📝 Example Workflows
Keyword-based Routing → If message contains “urgent,” assign to Support Team.
After-hours Auto-reply → If message arrives outside working hours, send a reply: “We’re offline right now, but will get back to you soon.”
Bot Handover → If query is about product details, route to Bot; if billing-related, route to Finance Team.
Understanding How AND/OR Conditions Work in a Workflow
Let’s take an example to understand how the AND and OR conditions function in a workflow:
1. Use the OR condition when either of the conditions needs to be true.
Example: If a client wants a workflow where a ticket should be assigned to the Customer Support Team when the message body contains either the keyword “help” or “support”, the OR condition should be used between the two keywords.
2. Use the AND condition when both conditions must be true at the same time.
Example: If the workflow should assign a ticket to the Hello Sales Team only when the message body contains both keywords “demo” and “hello”, then the AND condition should be applied.
In summary:
3. Use OR when at least one condition should be true.
4. Use AND when all conditions must be true simultaneously.
Note: The workflow works only for the first time when a new ticket lands in hello. Post that, one can create chat bots to set an automated message and resolve the customer queries raised later.
Also we provide auto assigning the tickets to agents or teams based on the priority set by the manager. Check out how to set the priority and permission through this help doc.
In case you face any issues, drop us an email at [email protected].
1663832908583941.png)