1663832908583941.png)
archive_How to create Lex Chat Bot
Live chat offers human-to-human communication and adds empathy to support conversations, while chatbots elevate the support experience by offering instant answers and automating responses to support queries. Live chat and chatbots work together to provide a high-quality customer support experience to your customer.
Lex Bot Doc
Here is the process to create Lex chat bot :
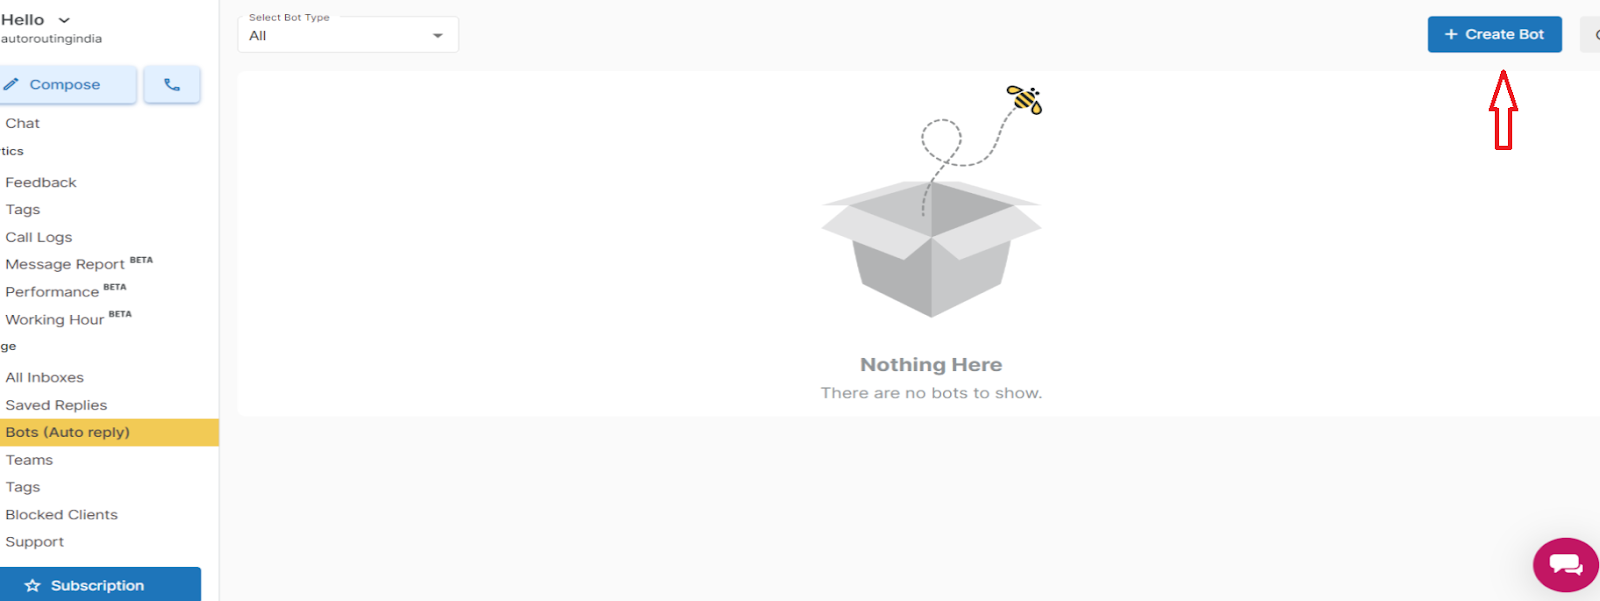
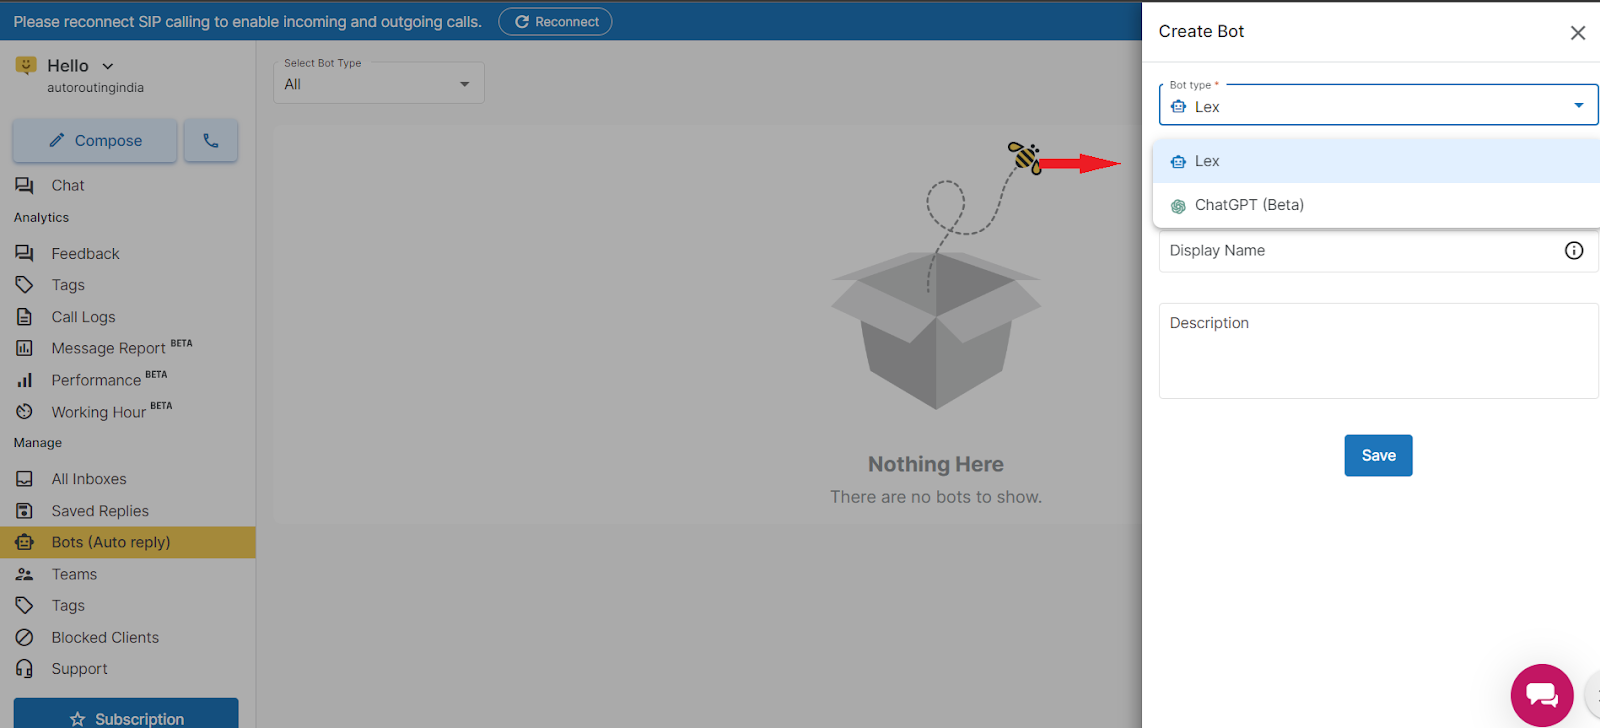
Go to Hello panel and click on Bots(Chat Bots) in Manage section. And click on the Create Bot.
Select the Lex Bot, fill in all the details, and click save.
Then the option to create intent will open, which means the purpose of creating the bot.
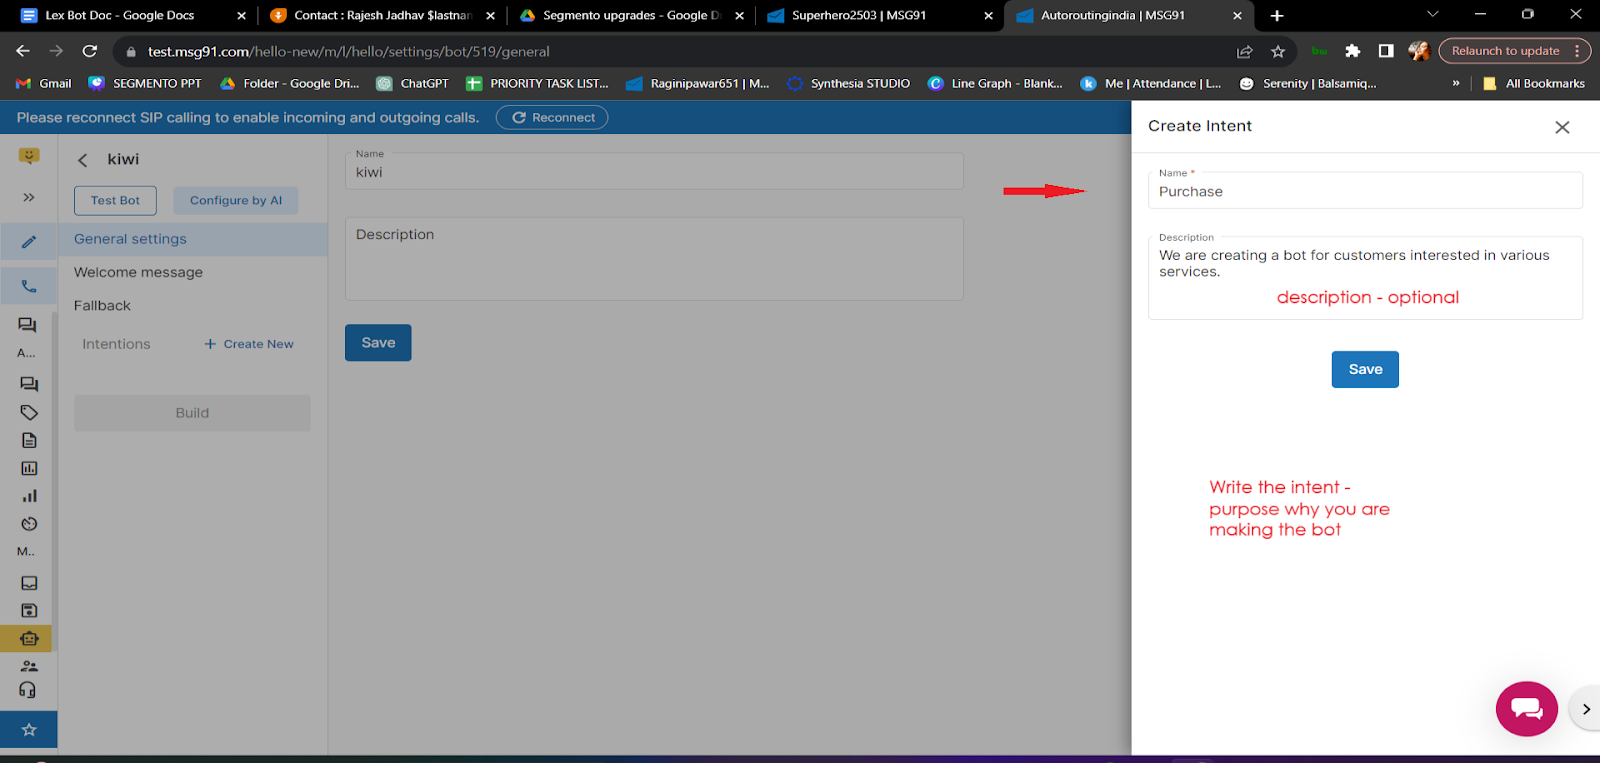
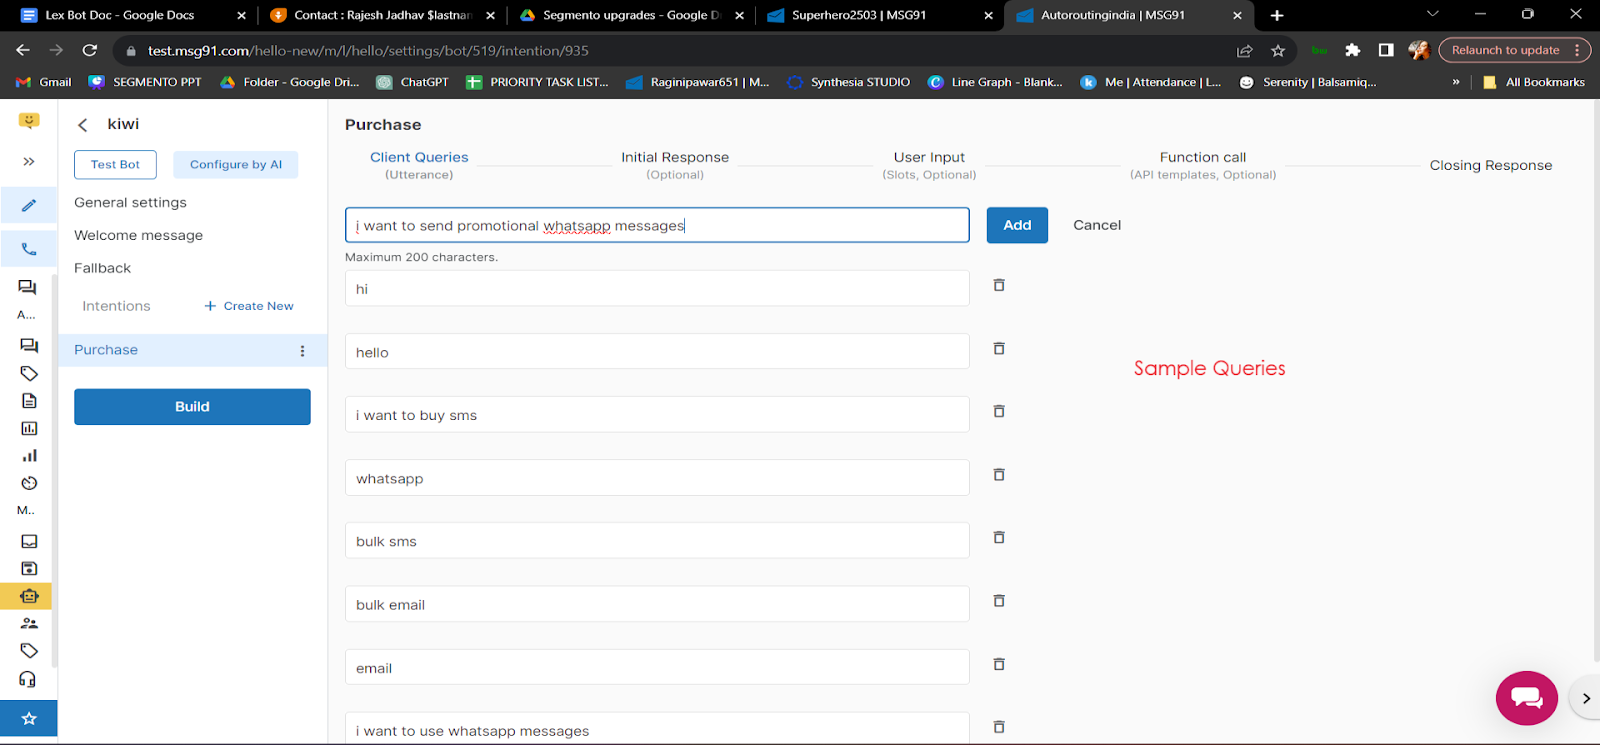
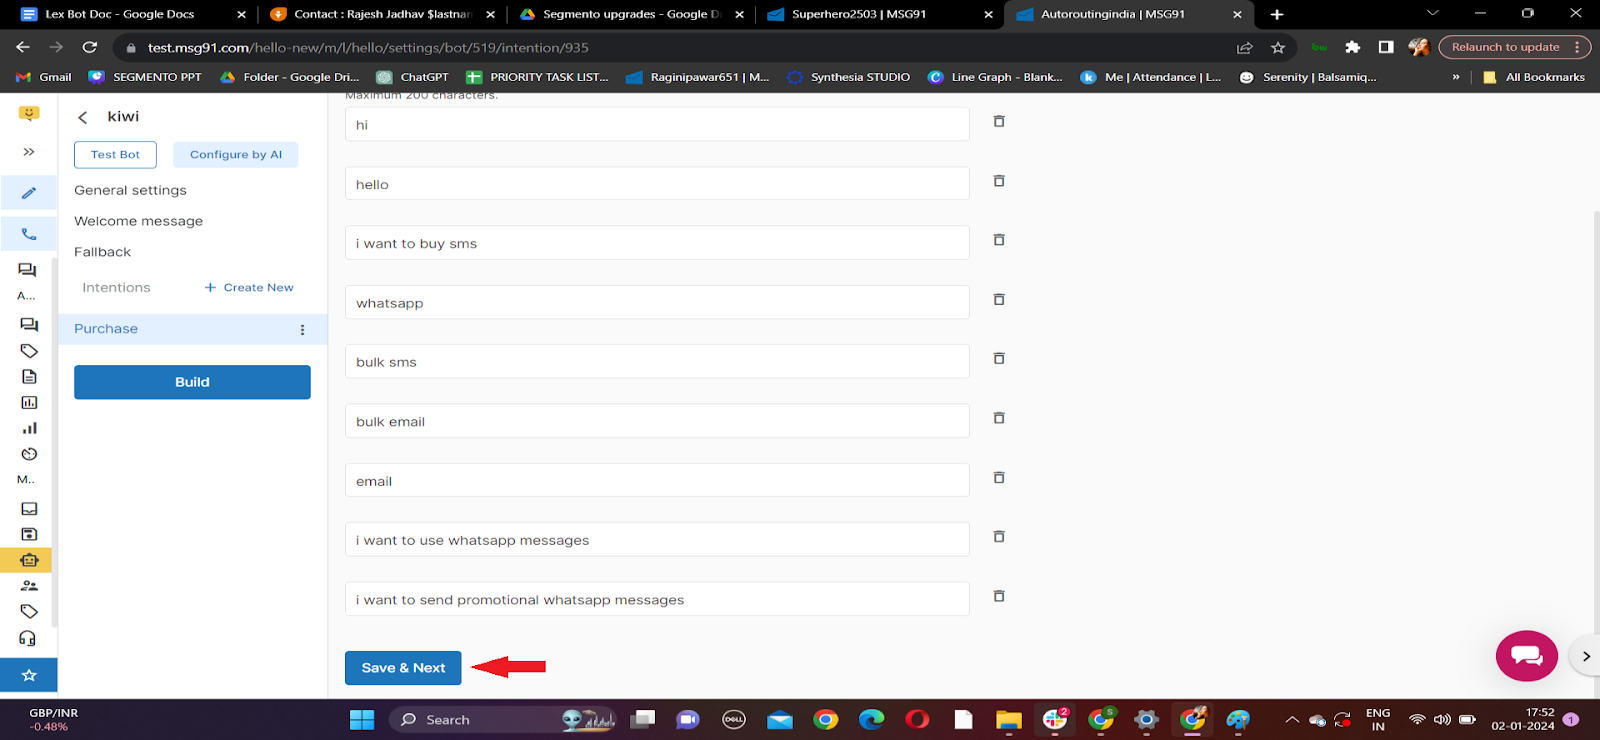
Add the descriptions and click on save, It will open the option to add details for the bot. The first option is to add Client Query means what will be your user's first query or words.
Note: These are required values.
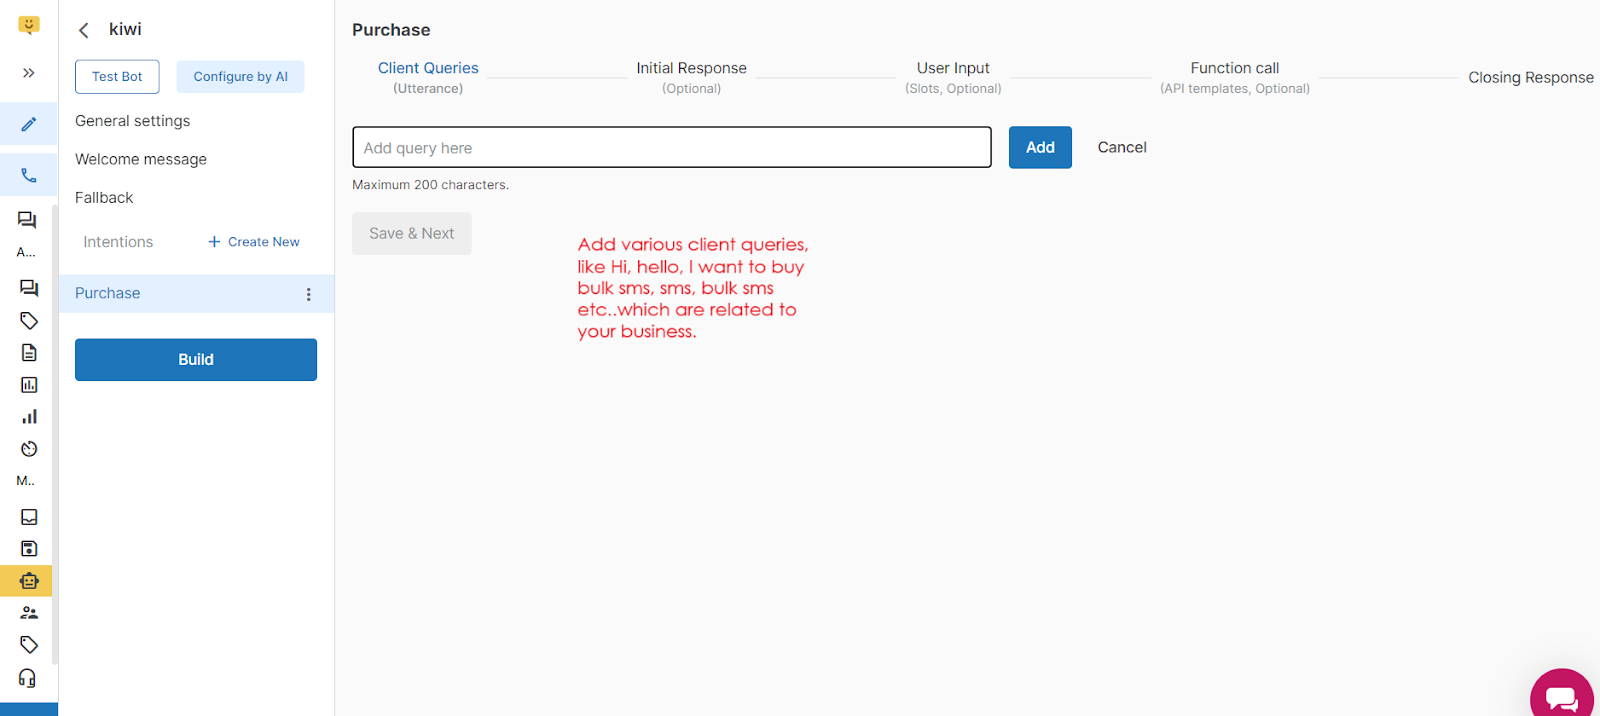
Here is an example of the most common queries of our business, you can add it as per your business. Add as many queries as possible, you should cover all the similar as well as different questions and queries. Note: The client queries should not be the same for multiple intents, for example: If you are providing {Hello and Hi} client queries for the first intent, then you cannot add on these client queries {Hello and Hi} other than the first one.
Click on Save and Next.
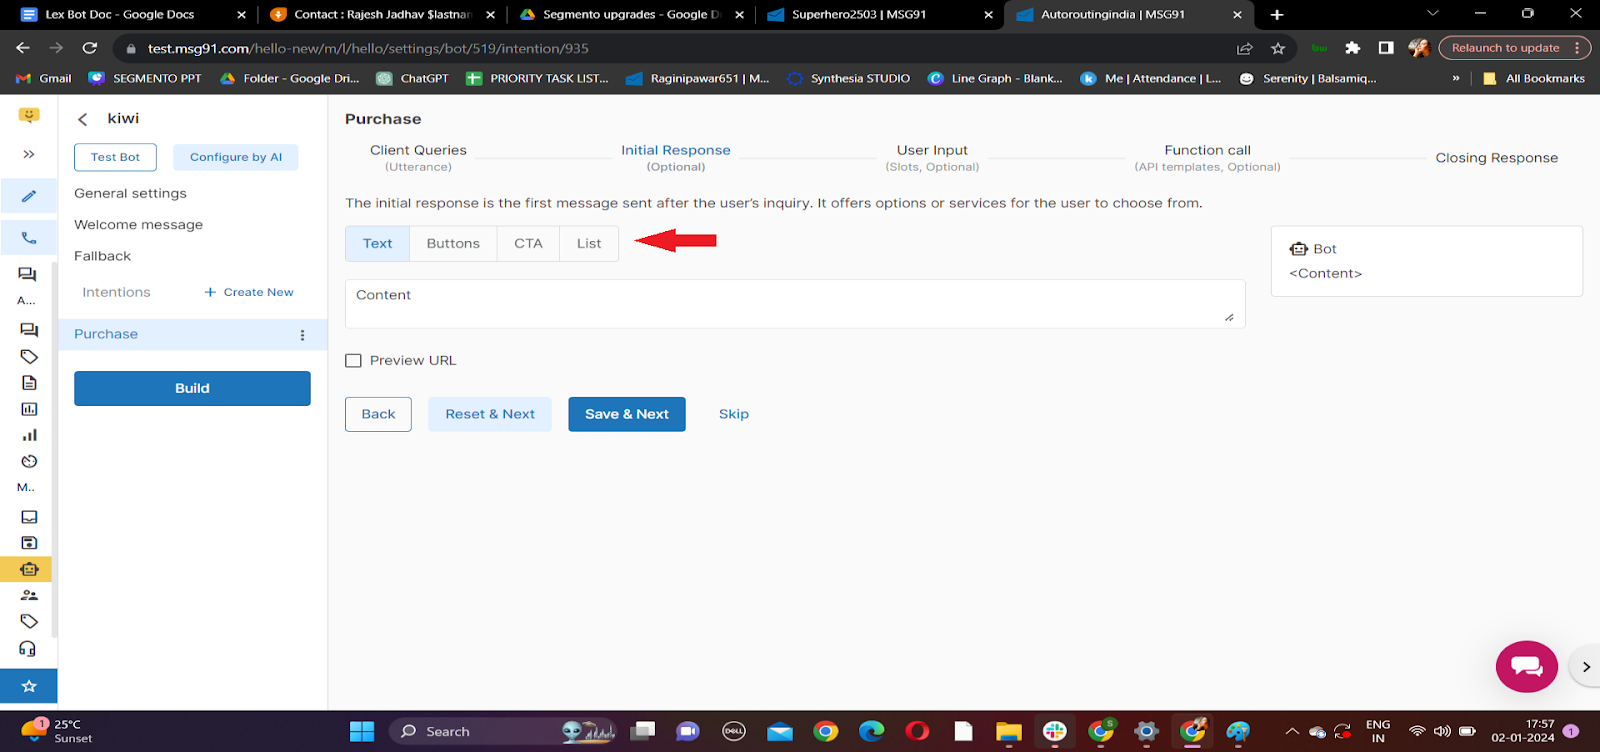
After this, the next option will be Initial Response- In this, the answer to the user's first query (say what will the bot respond after the user sends hi in the chat).
Note: Initial response is optional.
You have four options for your user's initial query.
Text - Only text will be sent.
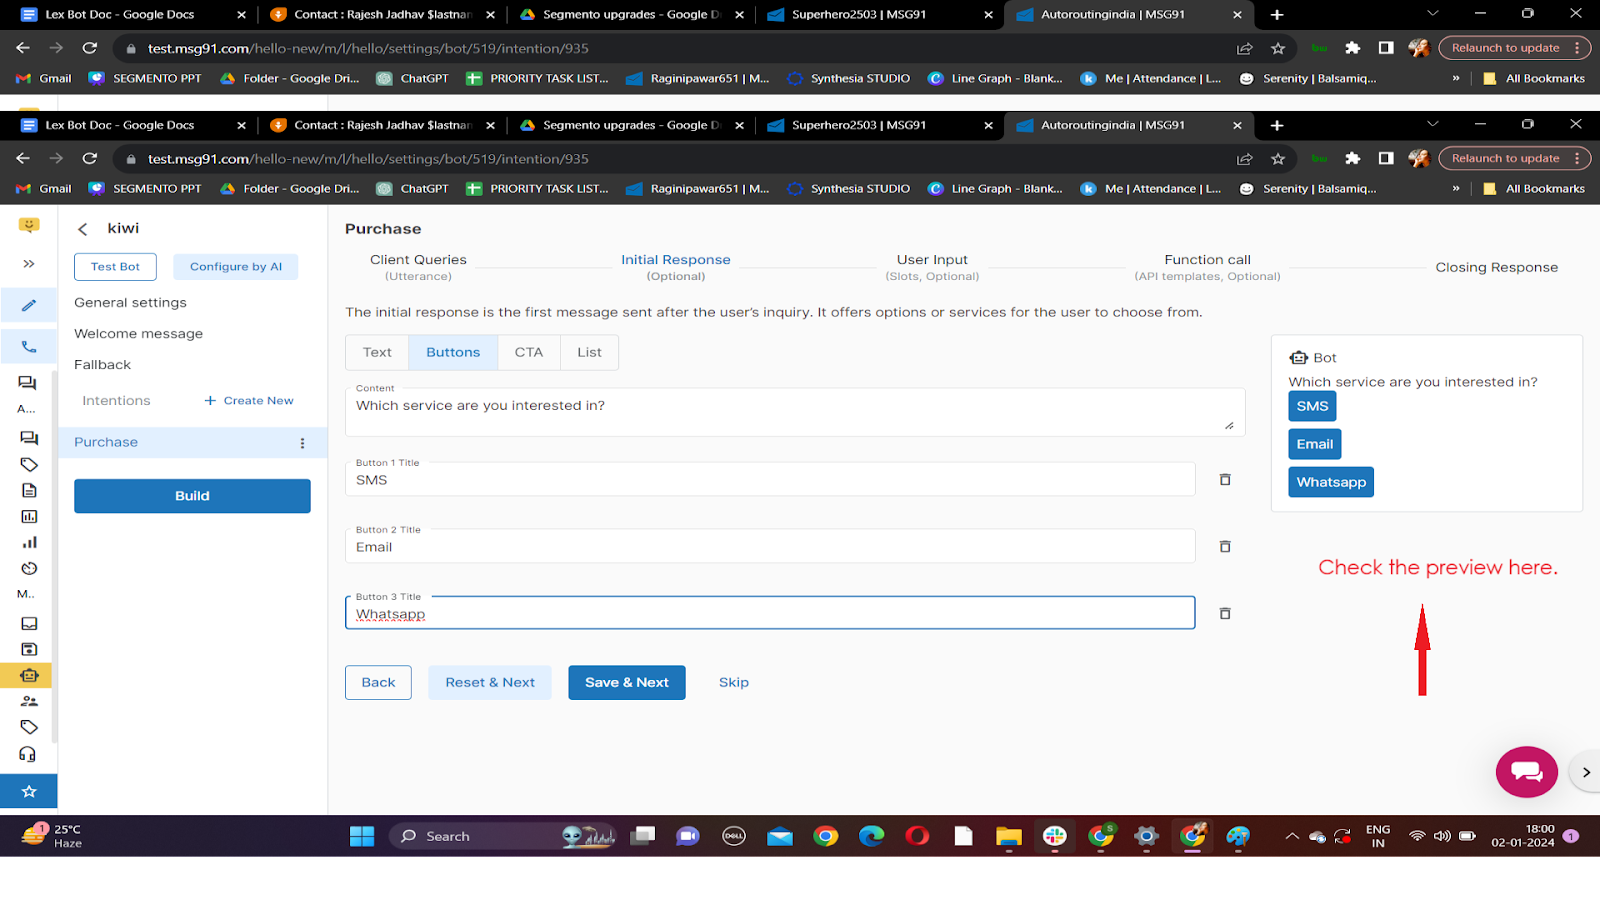
Buttons- we provide options to create three buttons so that the user can choose from them.
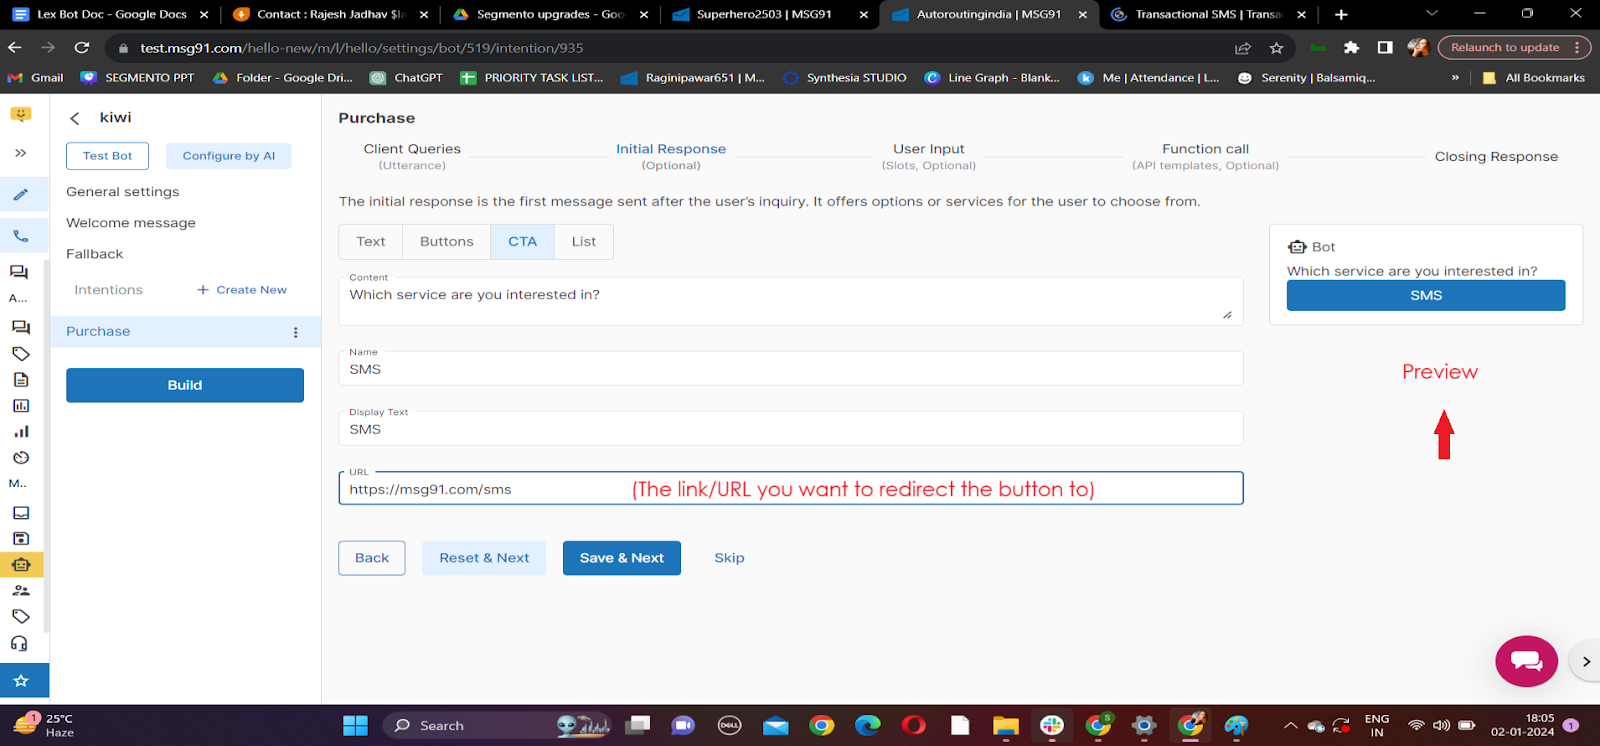
Like: Content- Do you want to know about our products, NO and MAYBE. You can add a maximum of 3 buttons.CTA - This means Call To Action. We provide users with call-to-action buttons, in which when the user clicks on this button, he will be redirected to the URL you will insert in the column of the URL.
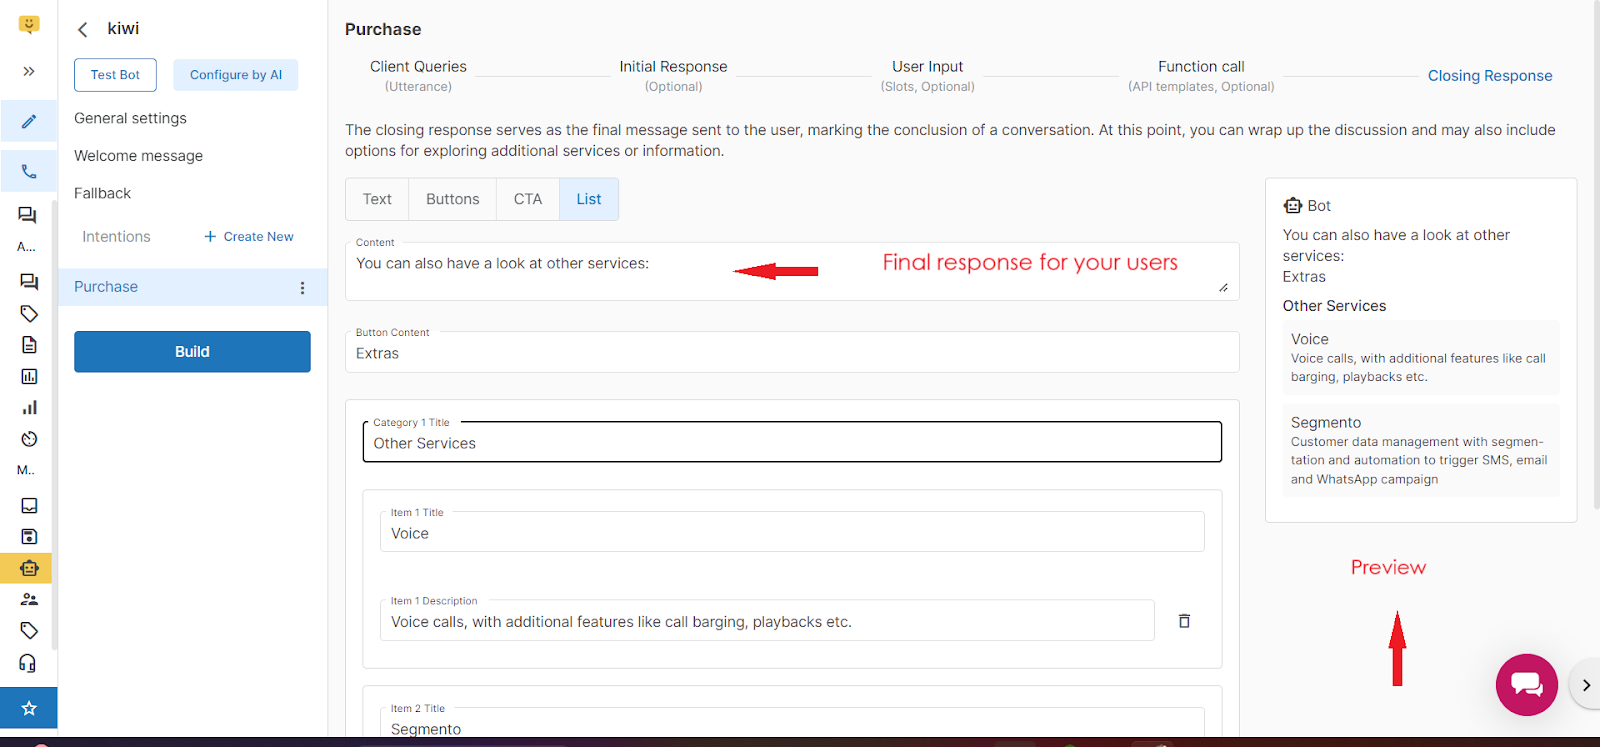
List- Here you can add down list of products, services, or various other options for users to choose from. The limit of items is 10, you can add at most 10 options.
Here is the preview of the text option. Note: The character limit in text is 1024.
This is how you can add button options. You can see the preview on the right-hand side.
Note: The character limit on the button is 20 characters.
Here is how you can add CTA. Note: The character limit in the CTA Name is 20 characters.
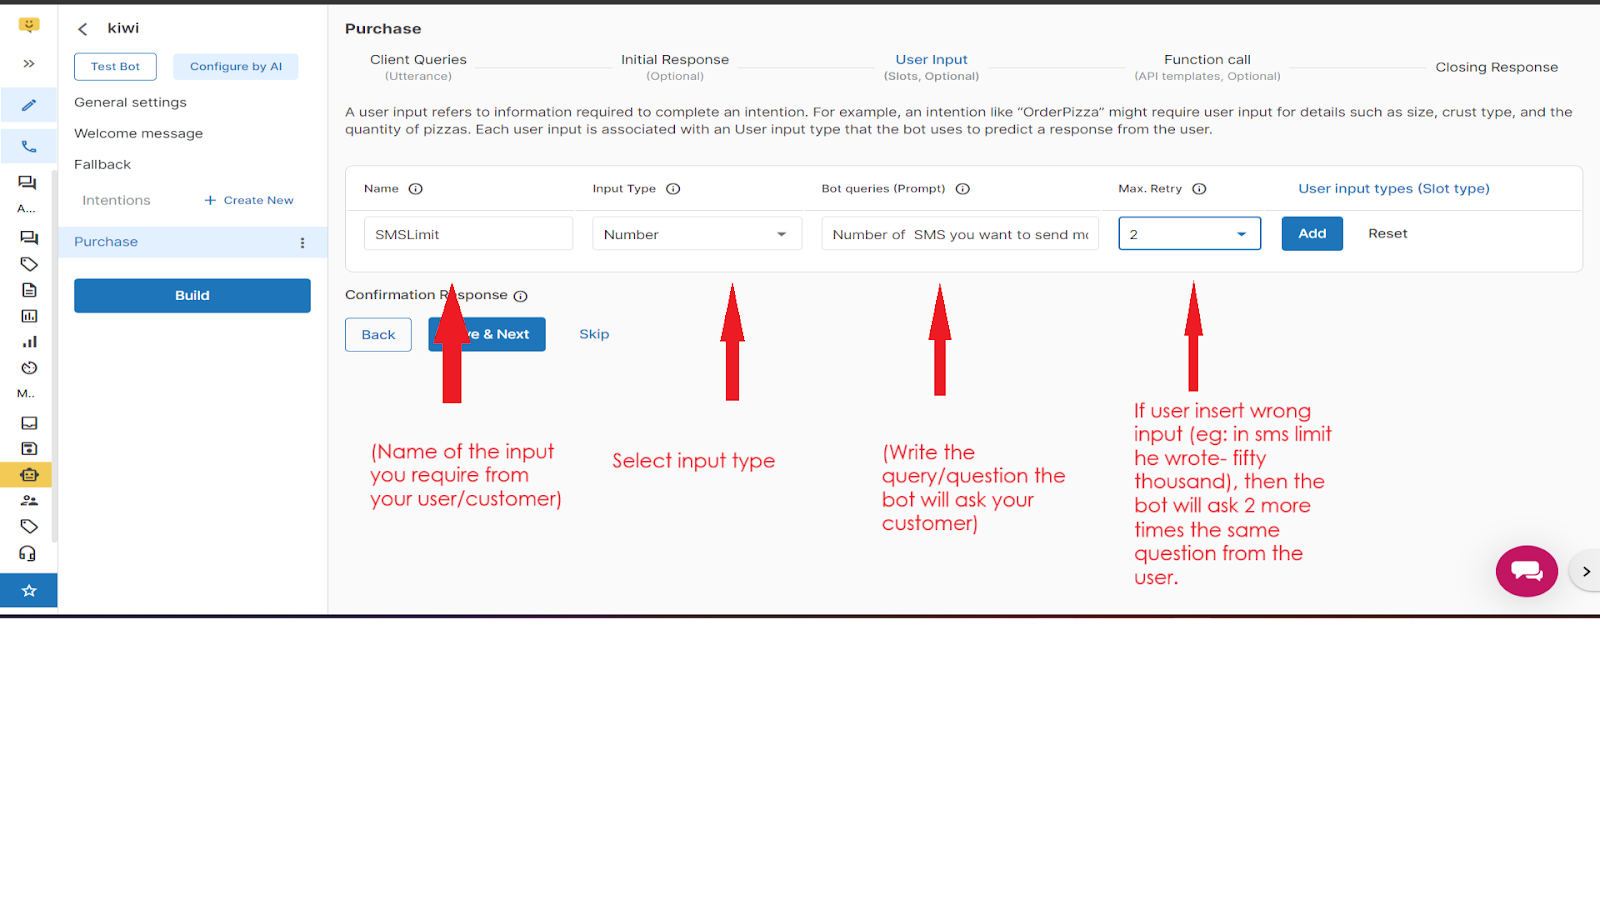
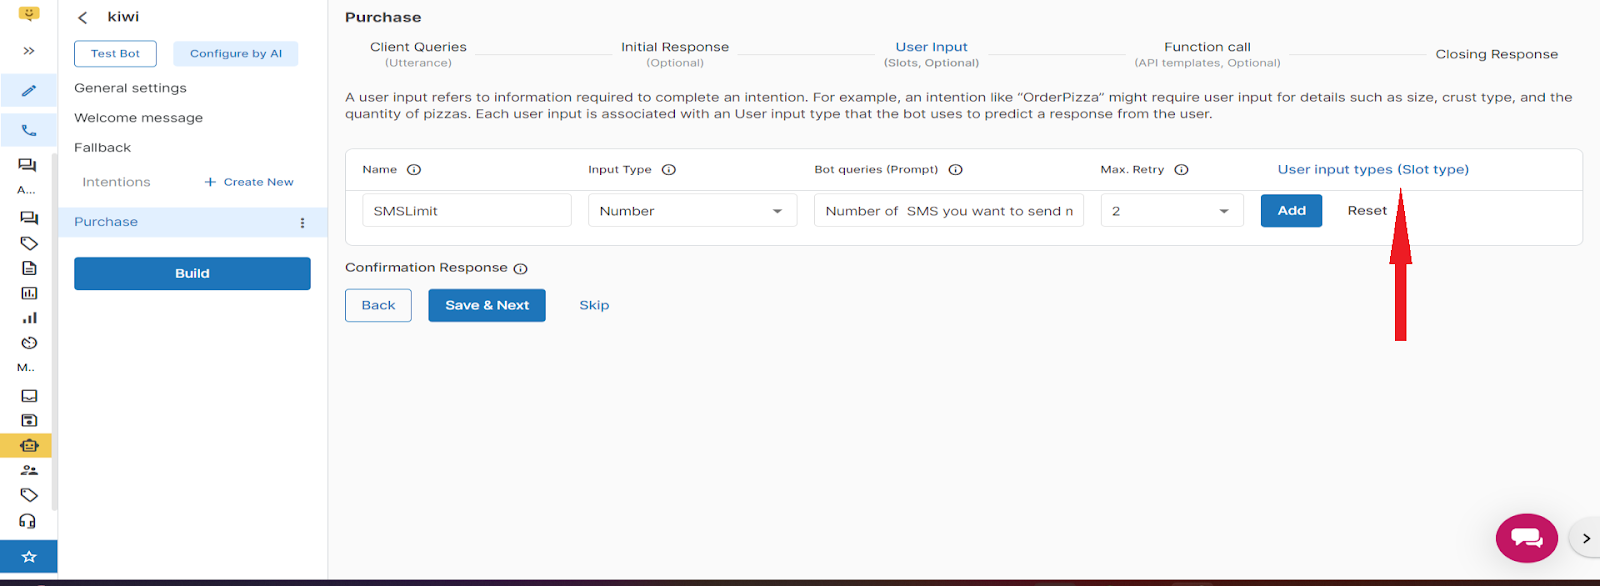
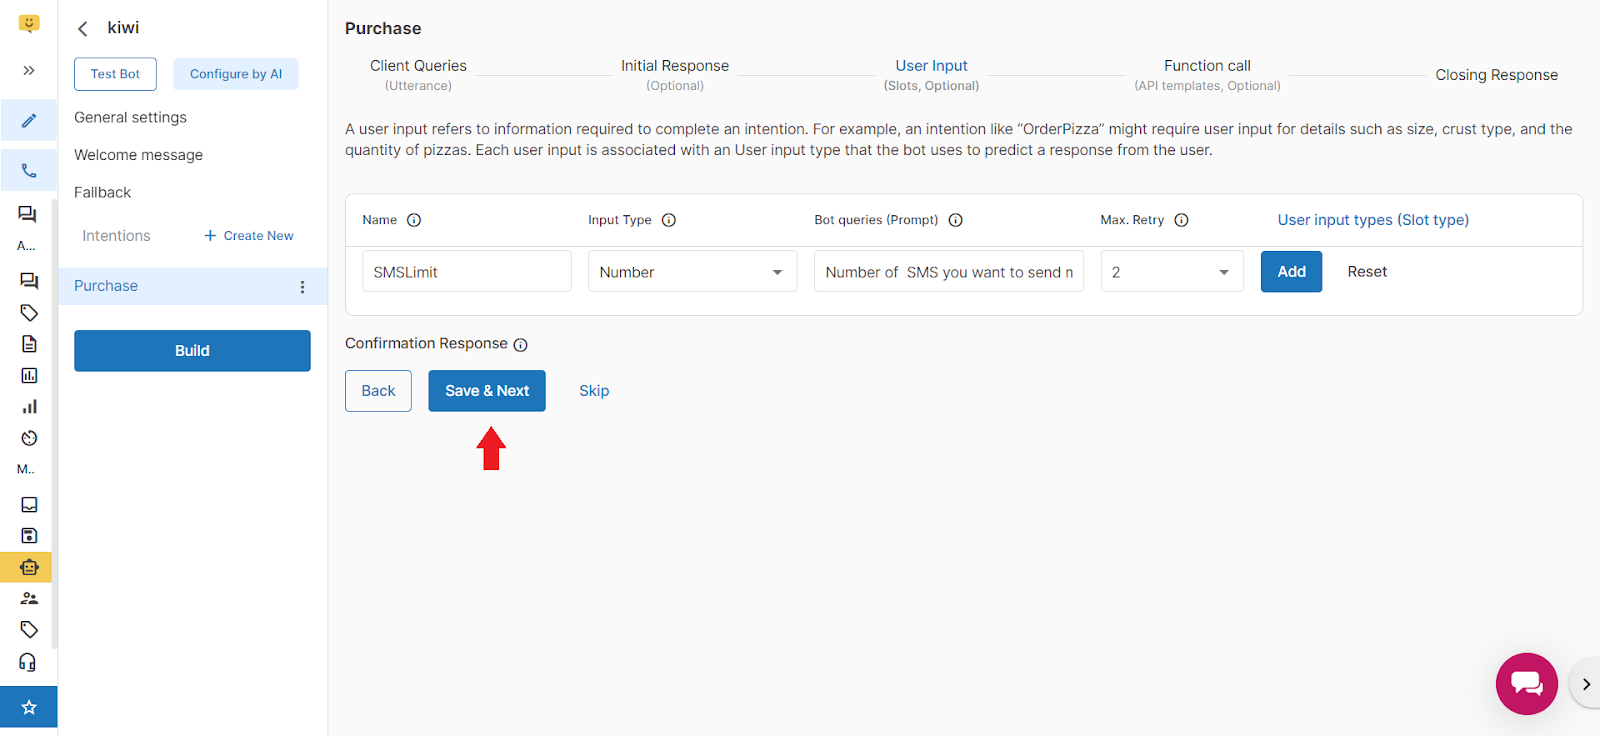
After the Initial response, the next option is to add information on User Input:- This means the bot will ask these questions from your users after they respond to the initial response.
Note: Slot names should not be the same for multiple slots, it is a required category.
Like if you want to know the size of the product, and the type of the product from the users.
You can add as many questions here as you want to ask from the users.
Here you have to provide the following:
Name of the input (like size, type),
Input Type (we provide various options in the dropdown like number, alphanumeric, date, etc.),
Prompt Query- What query will the bot ask in the chat, and
Maximum Retry - How many times do you want to repeat the query from the user when the user provides the wrong answer.
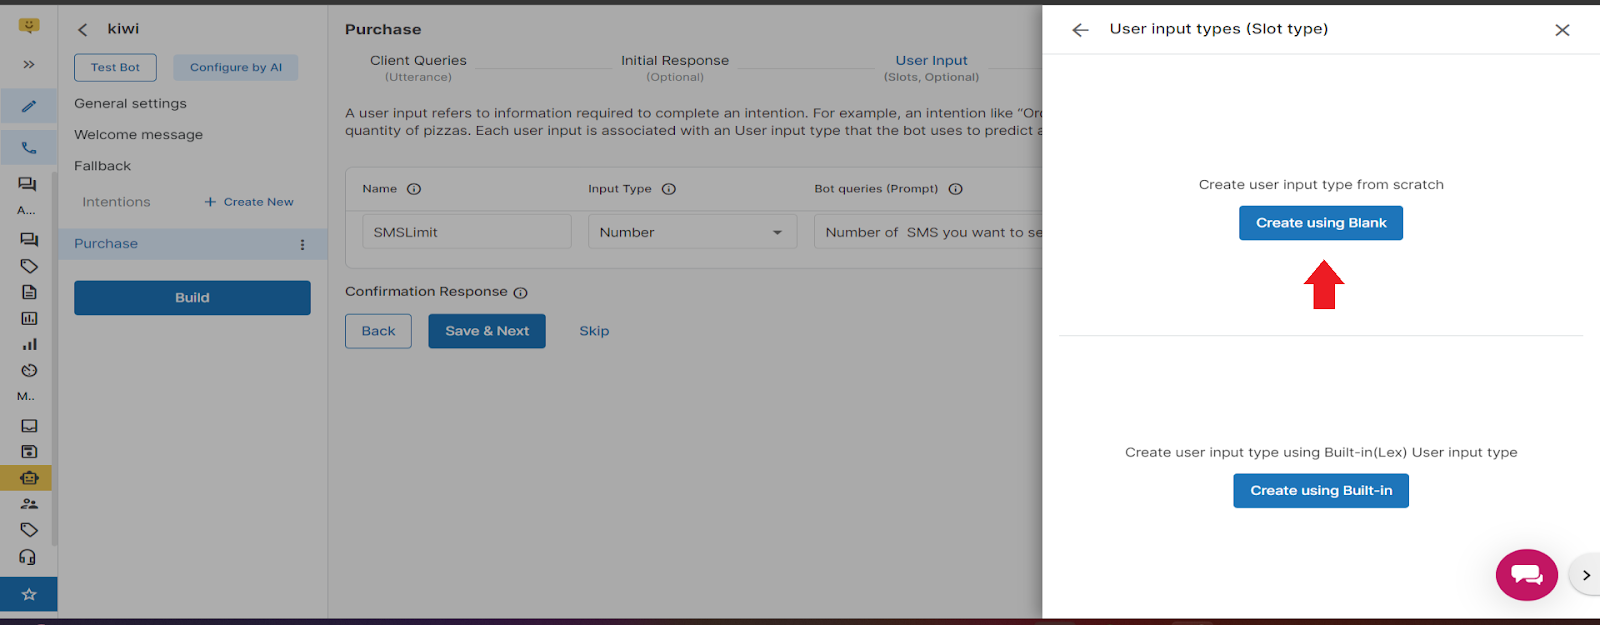
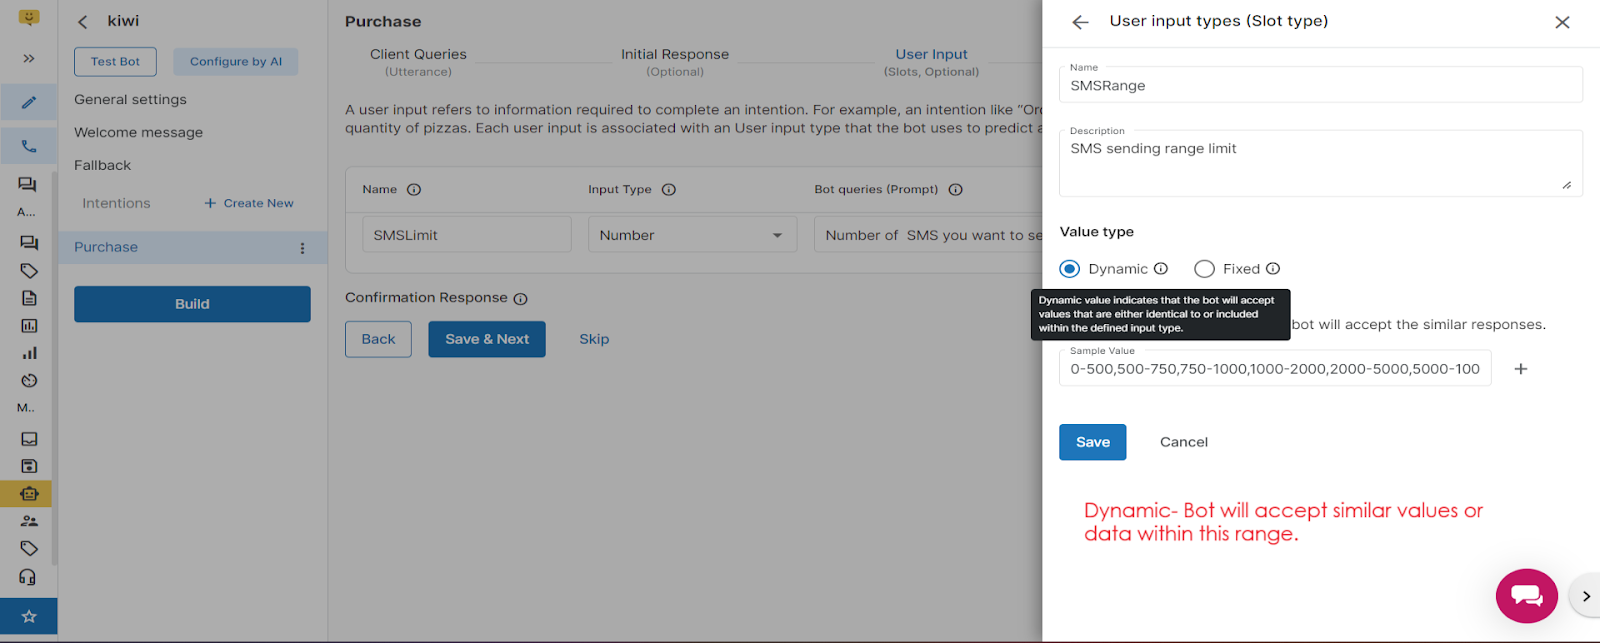
You can also create a new input type too. There are two options: The first one is "Blank" and the Second one is "Built-in".
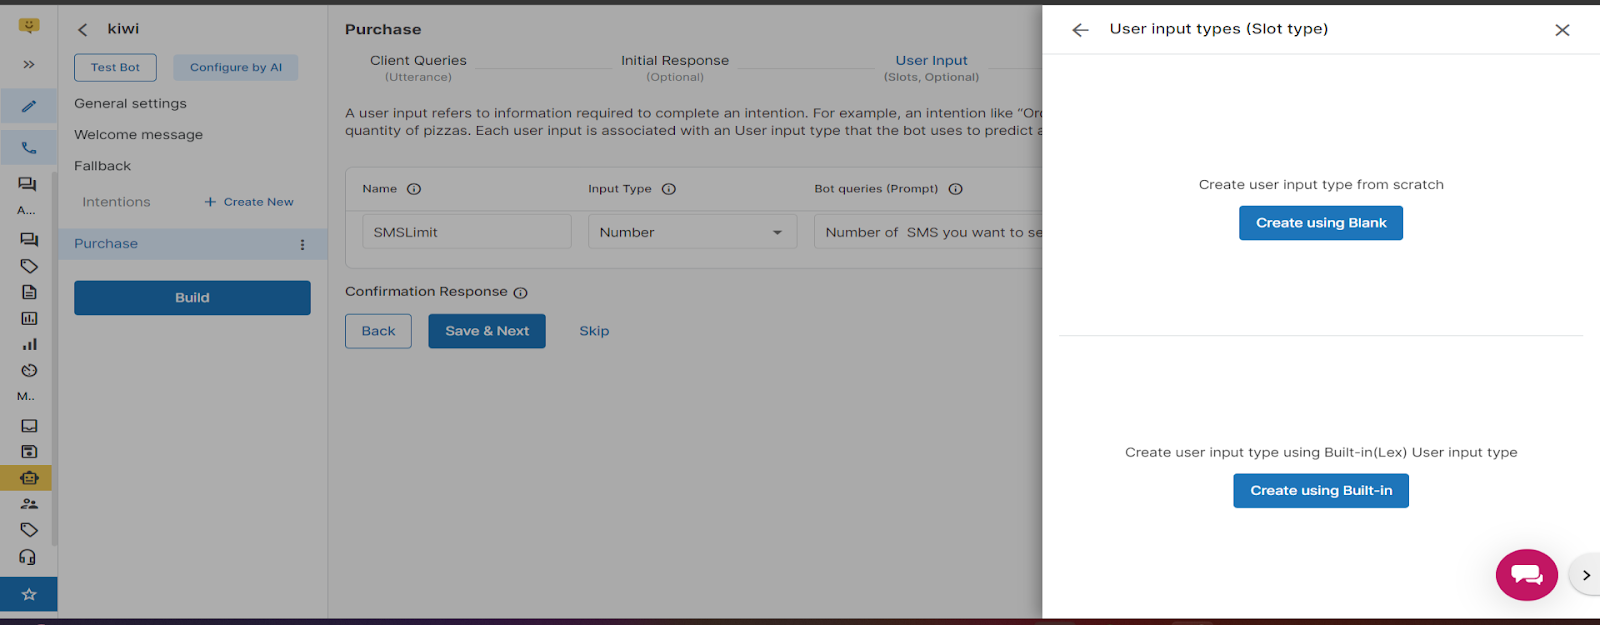
In the Blank Option: You can add information as per your requirement.
There are two options: If you select the first option which is "Blank", then you will see there are two value type options first one is: 'Dynamic' and the second one is 'Fixed'.
In Dynamic- The Bot will accept similar or the same values as you will provide in the sample.
In the Fixed option- It will accept only the value you have mentioned in the sample, the exact value.
For Dynamic Value Type:- We are providing some in-built slots but if a user wants to create any custom slot then they can use the dynamic type.
You need to add on 10-15 same types of sample values trained by a bot
For Example, we consider NAME as a slot type
1st character - u, 2 characters - Om, 3 characters - Joy, 4 characters - Anuj, 5 characters - Raman, 6 character - Rakesh
In Fixed: The Value you set the same will show.
If you want to take specific 3 to 4 country responses you can give specific names in fixed
For example - If your question is from which country you are?
India, USA, Australia -
If the answer is related to these 3 countries then the bot responds, other than the bot will not reply.
If you add on the sample values and synonyms for the fixed type, then by default it will pick the sample values at the first attempt and then it will take on the synonyms.

Click User input type Built-in: Basically, it is the extended functionality we are providing by using the Built-in Input Type. In this functionality, you can verify the input provided by the user of your slot prompt.
For now, only the Alpha Numeric input type is supported.

Use case: For example:
If you want the user to provide the Postal Code, the business is supporting mainly 3 formats which are: Numeric for India {123456}, Alpha-numeric for UK {GU16 7HF}, and Numeric-numeric for US {1234-12345}. In that case, the business will create the Regex Expression which will support all three postal codes.
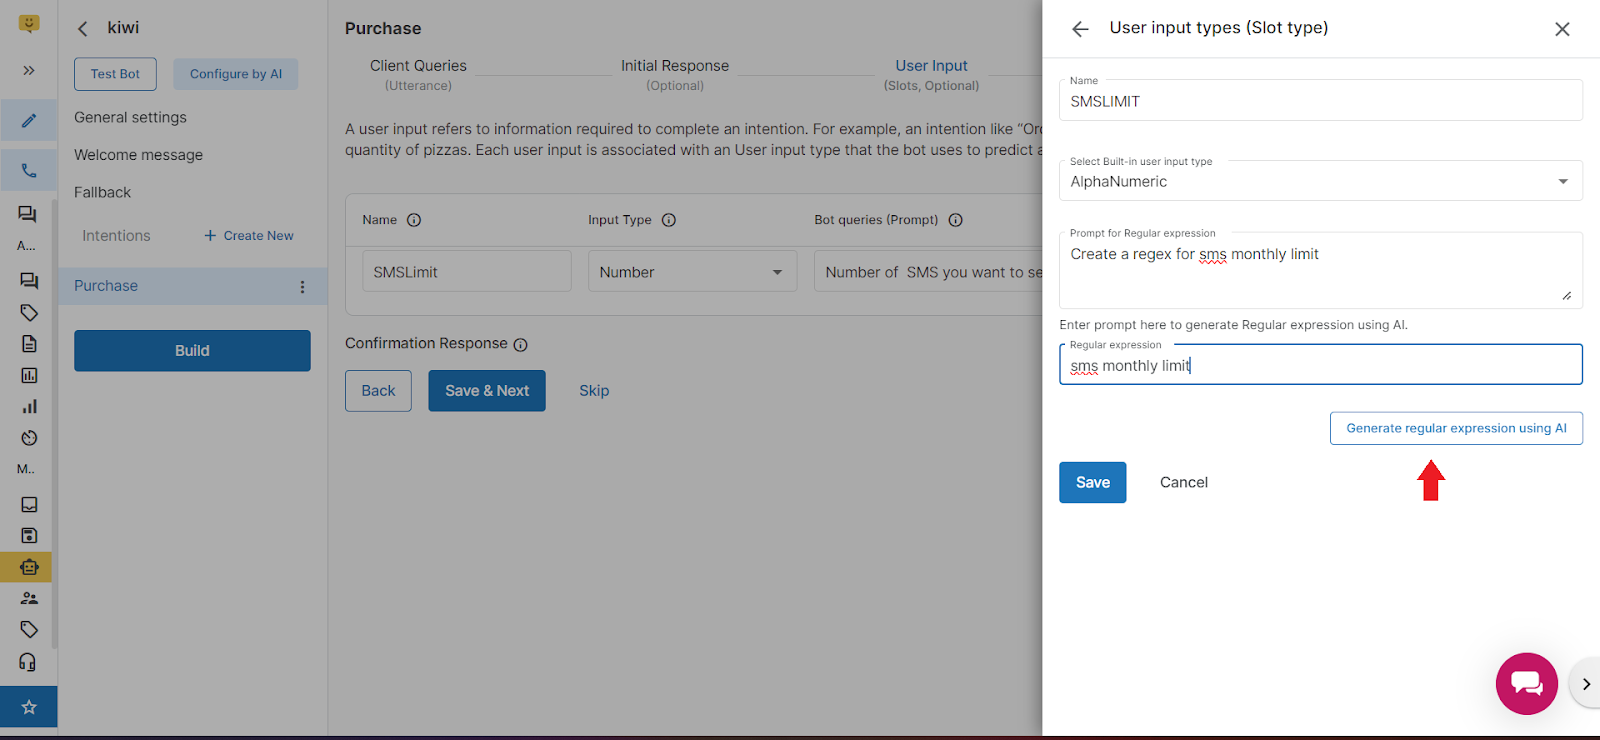
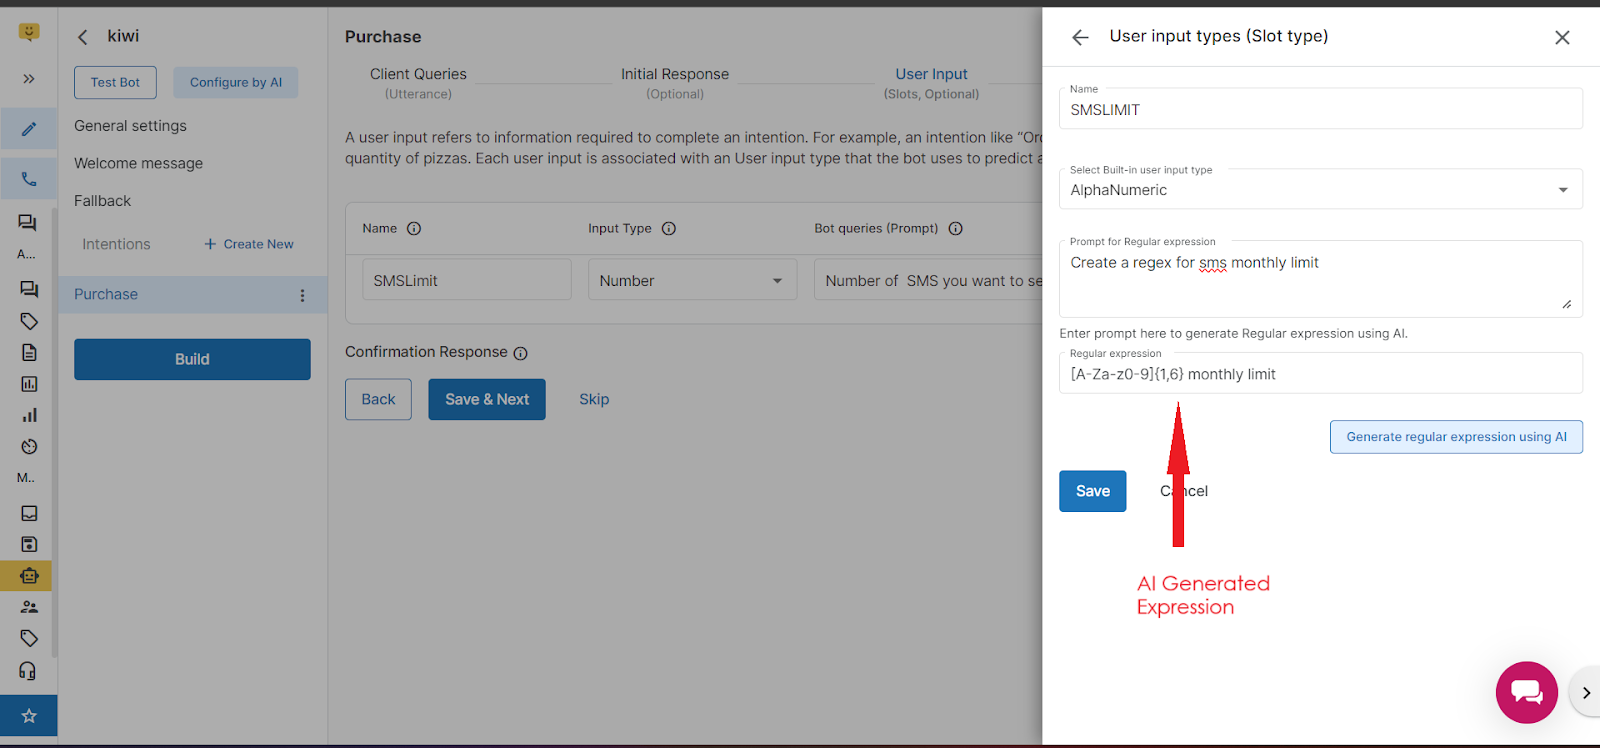
Once you add this, the input type will start showing in the drop-down of input type, from there you can select this input type.
Click to save and the next button.
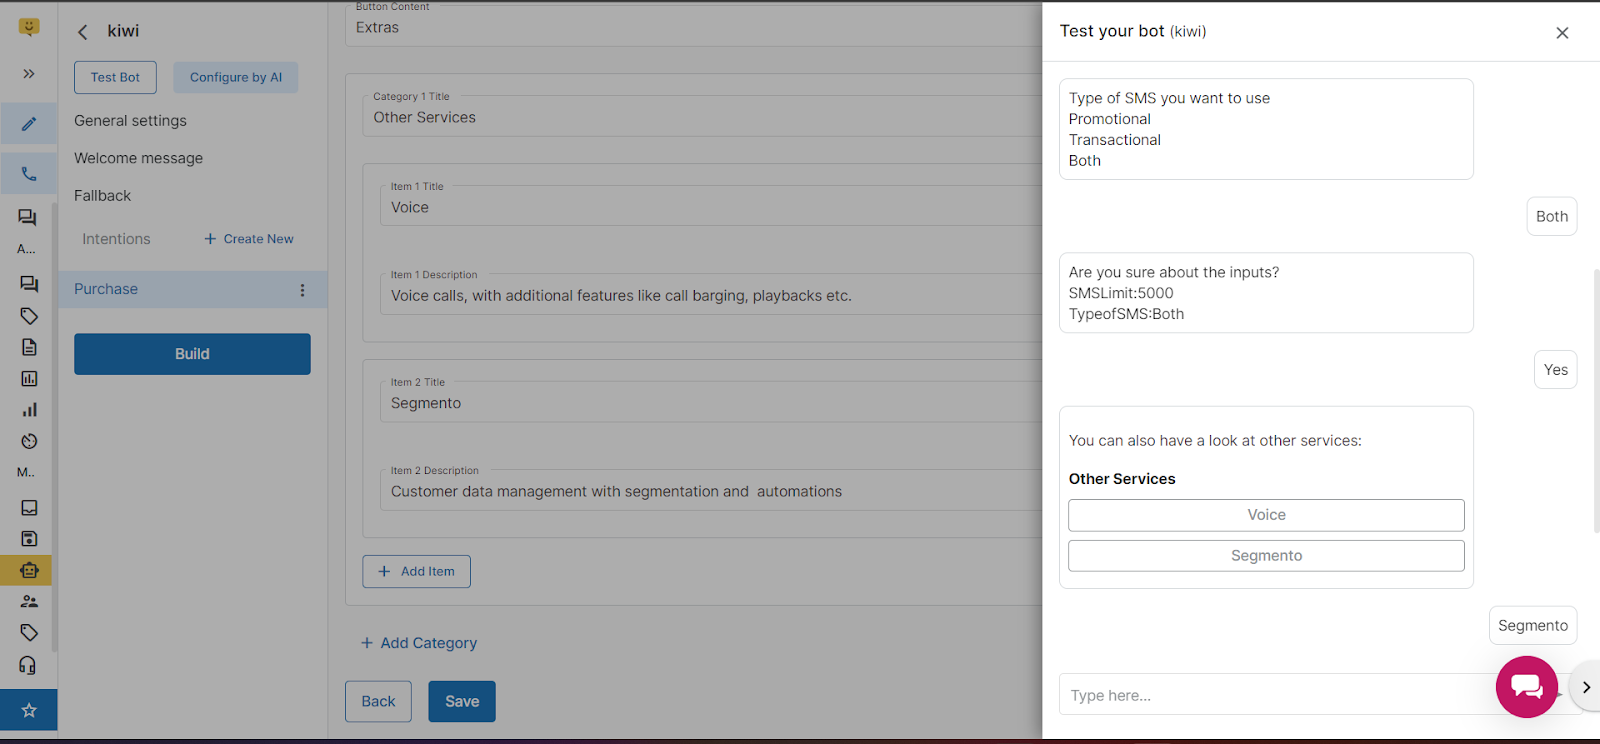
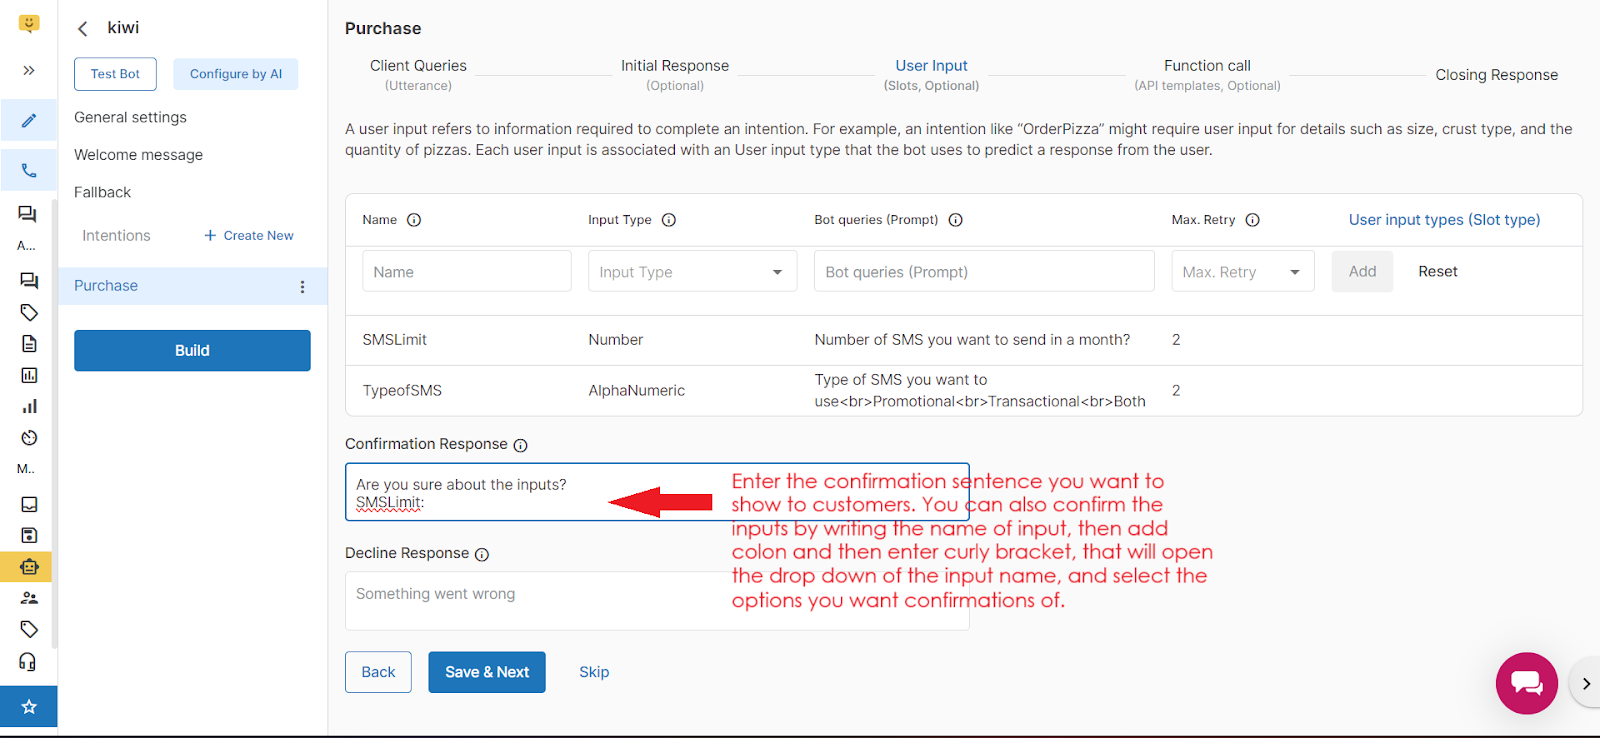
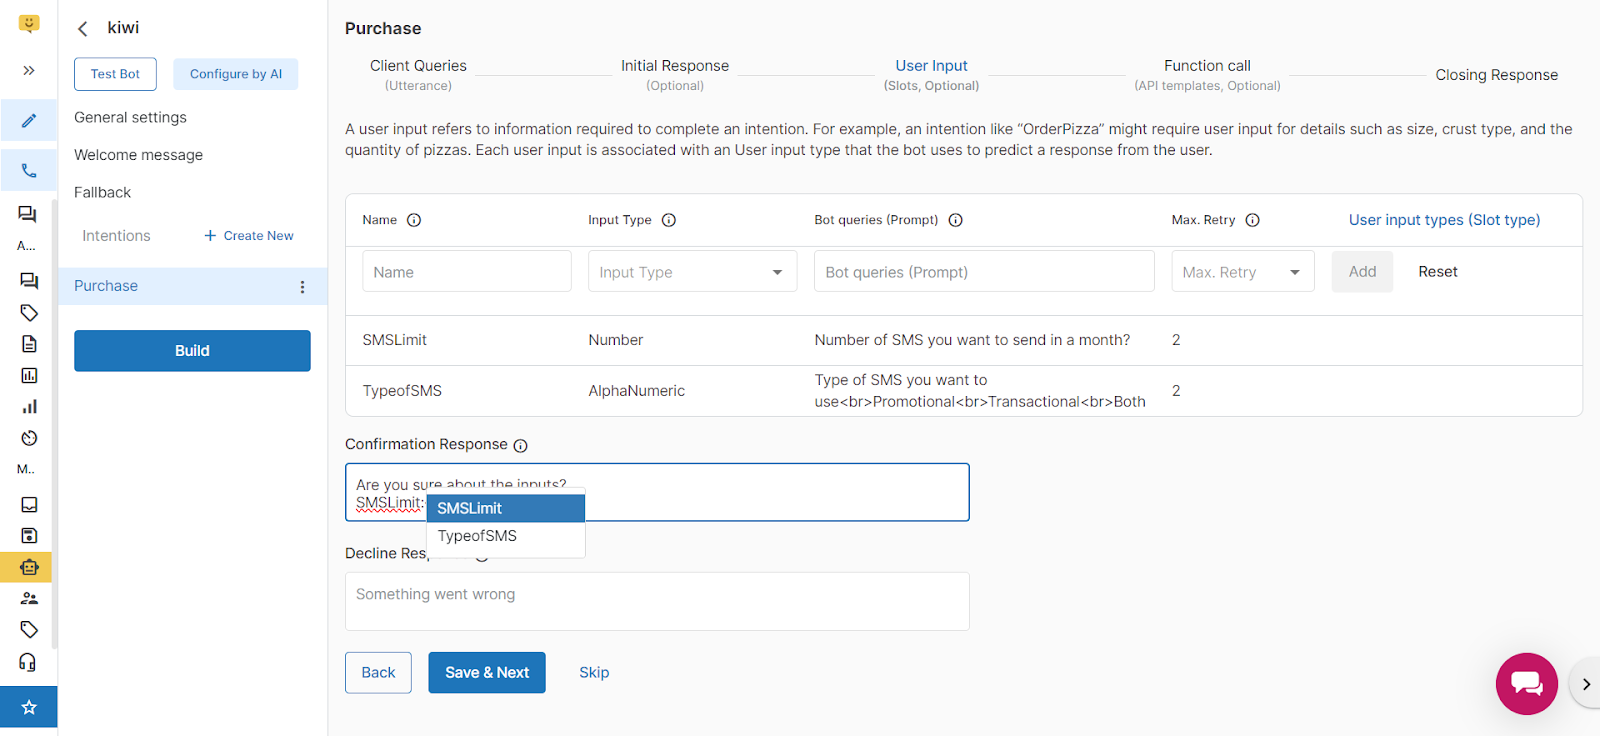
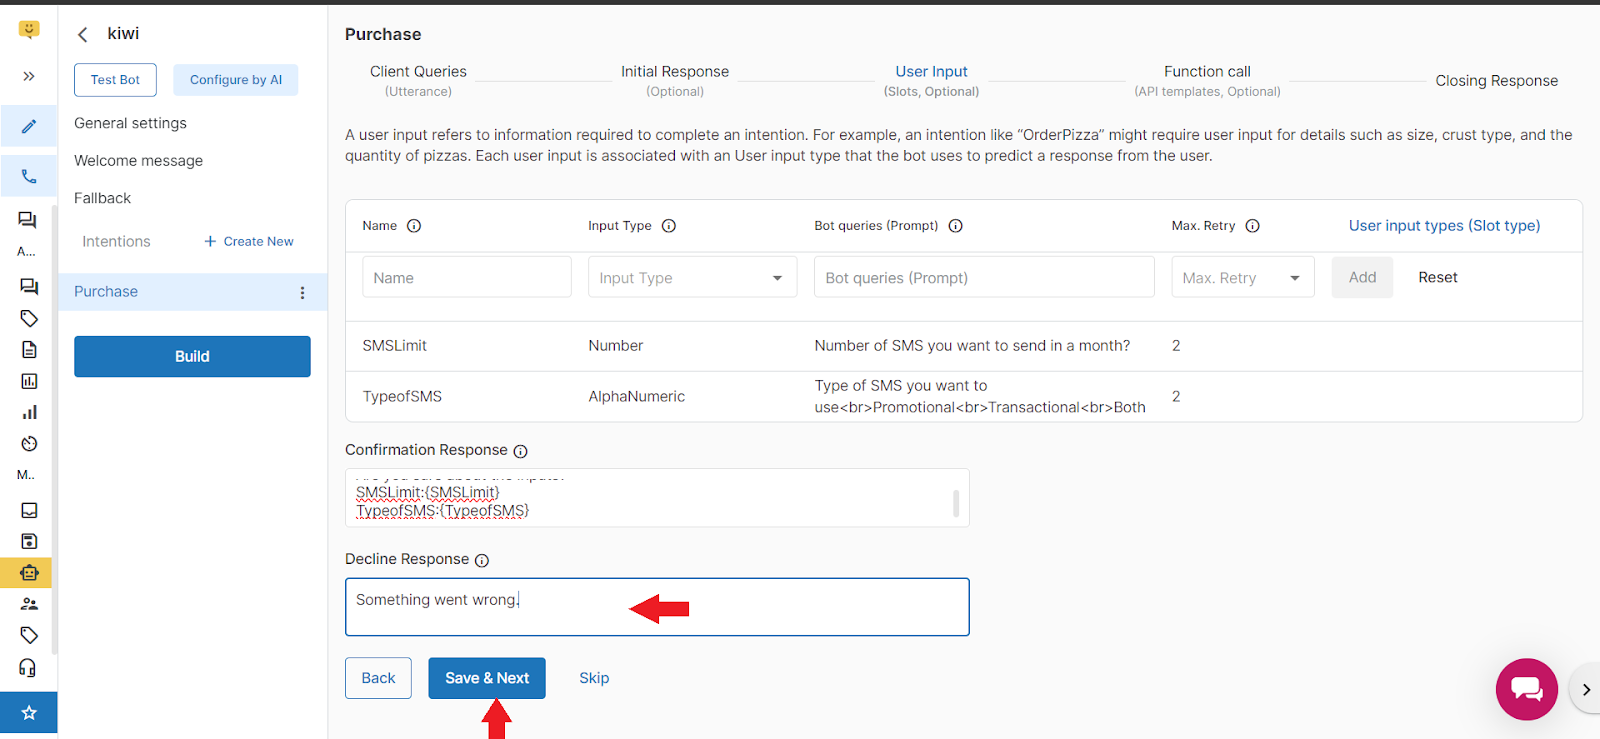
Confirmation Response
This will be sent when all the prompt responses are fulfilled by the user who initiated the chat.
You can add all your slots value
Decline Response
This response is sent to the user when the user declines the intent. For example, for the prompt, 'Do you want to place the order' and the user responds, 'No.'
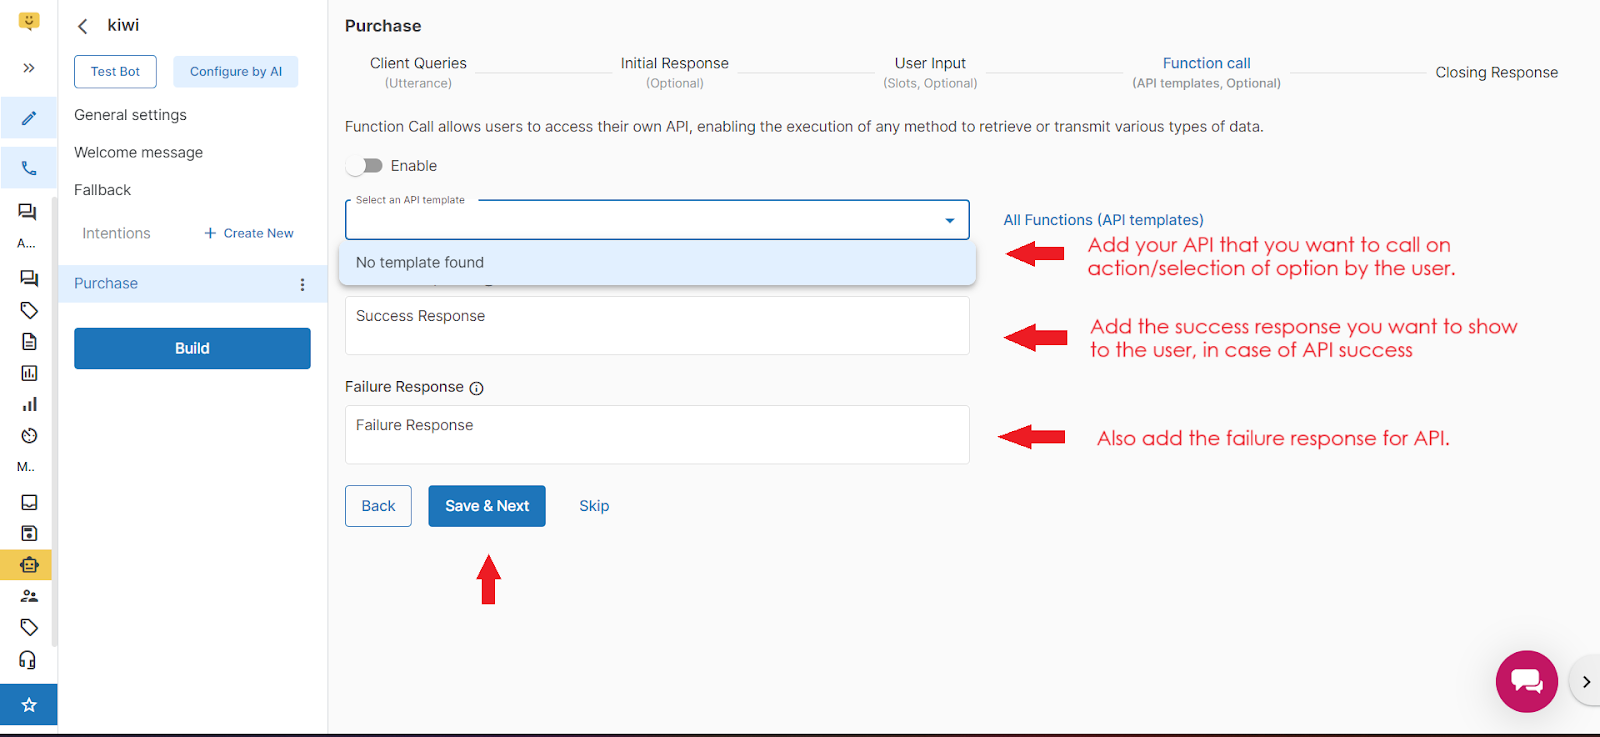
Functional call: [API Call: It is optional to create it]
Here you can add your API that you want to call on action.
Then add the success response that you want to show to the users in case of API success.
Add the failure response for the API
Use case :
Then click on save and next
Closing response
You can create your closing response in text format, button format, CTA format or in a List format
After completing the conversation this closing response will work.
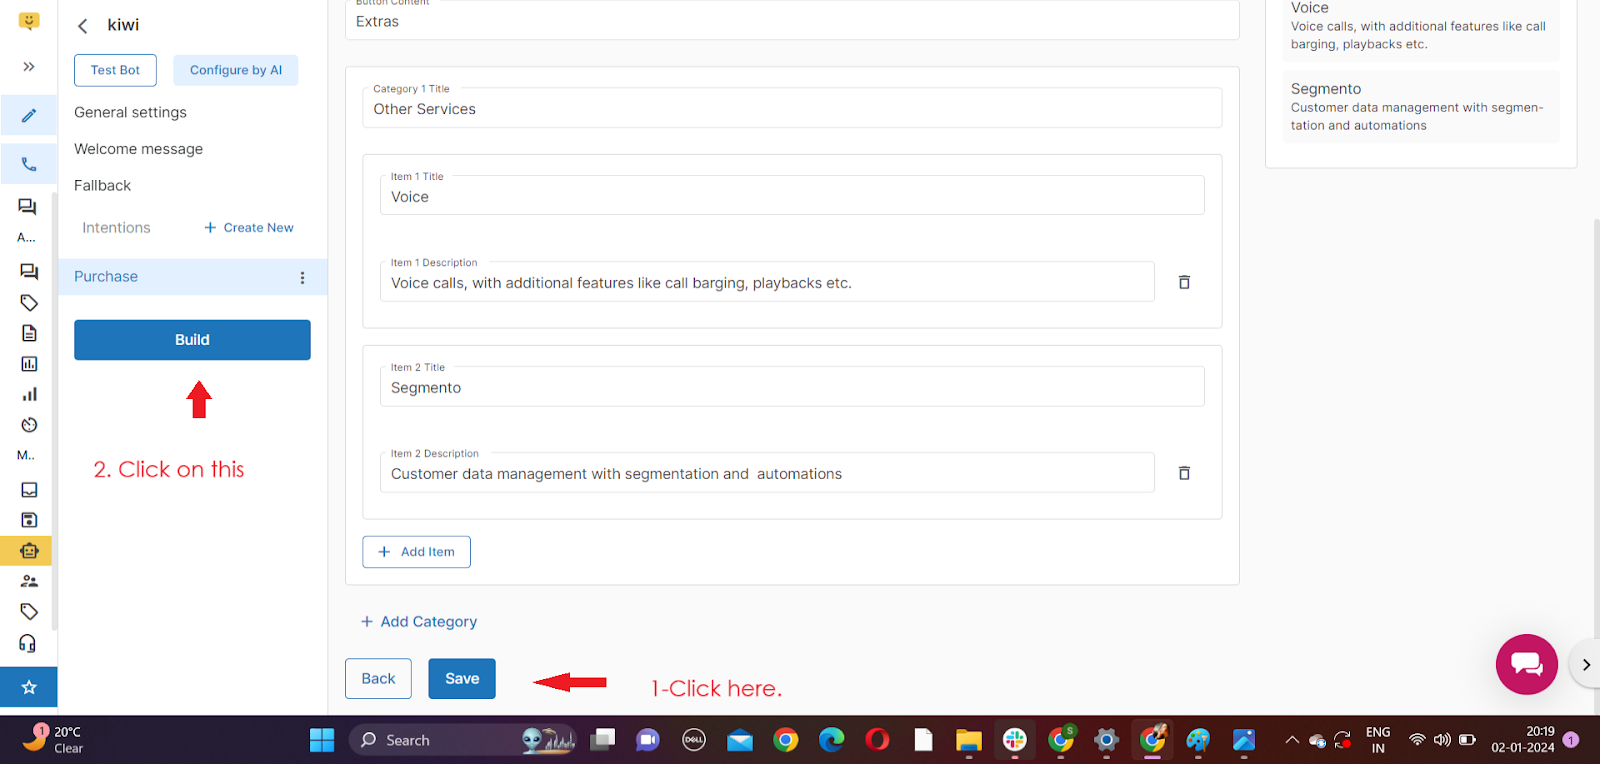
After that save your response and click on save and next.
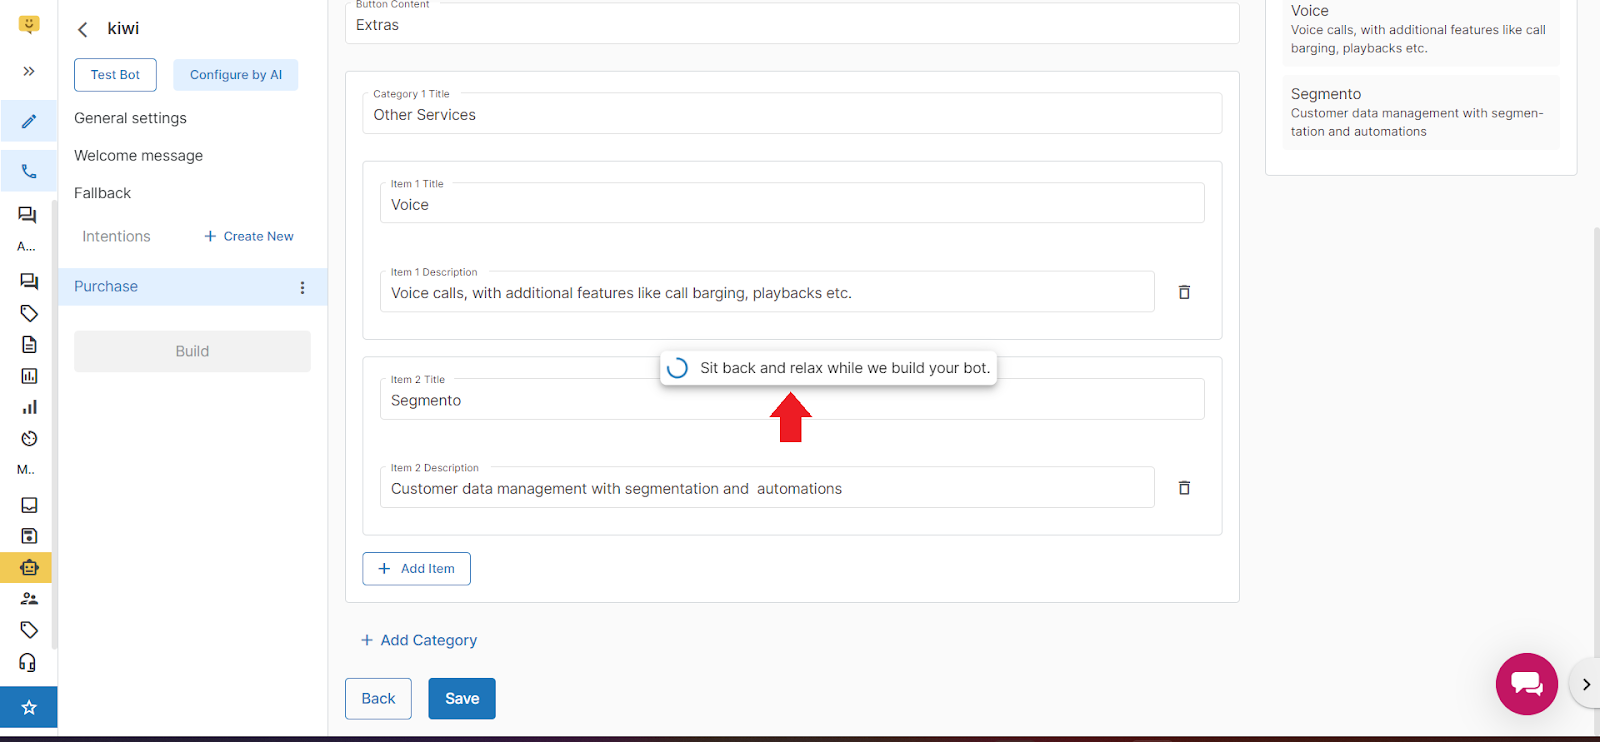
After completing all the steps. Click to Build option to save your all steps and create a bot.
After clicking on build option, don't go on another tab and wait for a while it will take some time to build a bot.
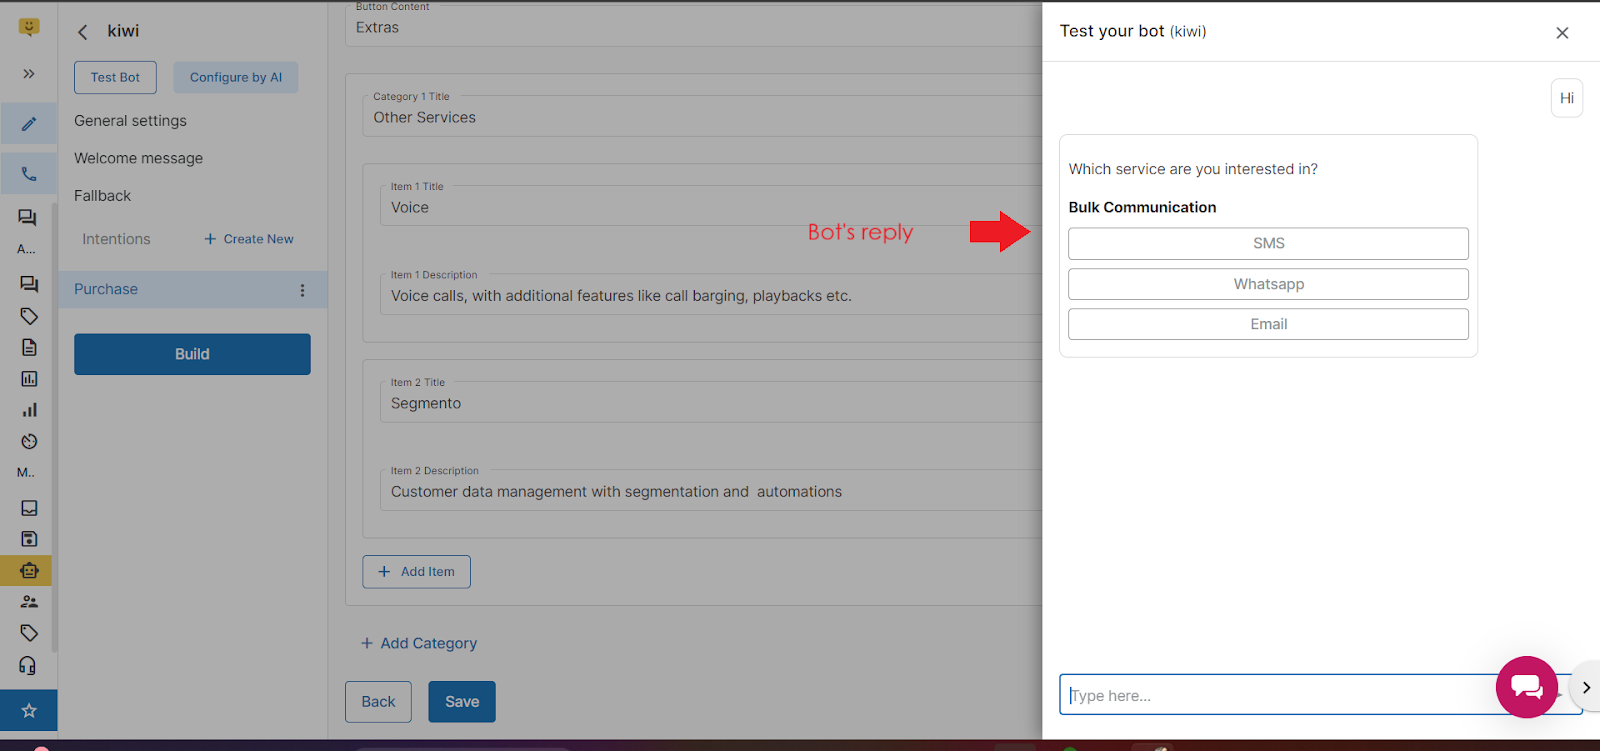
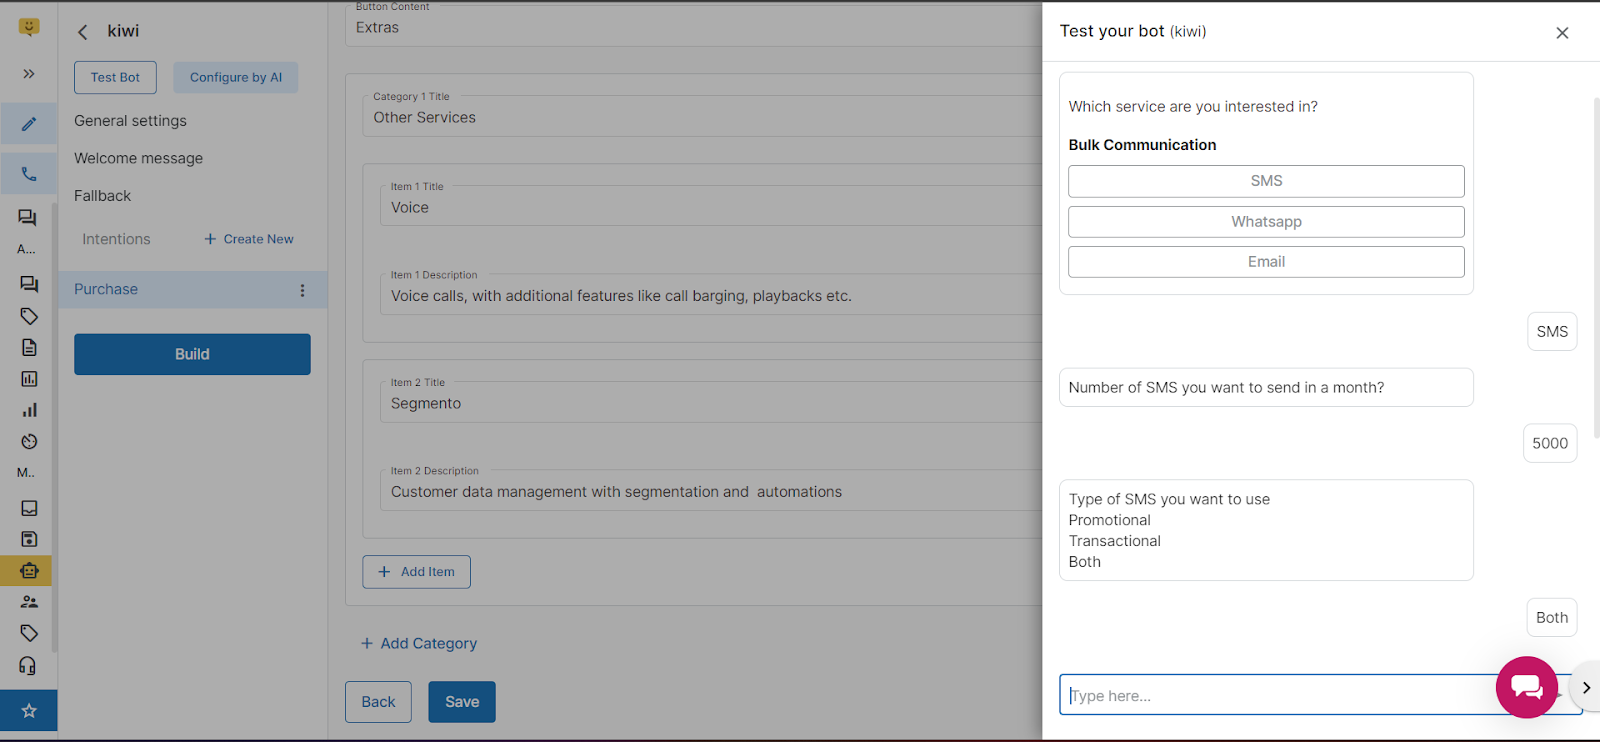
Click to the test bot button on top of your left corner and then test your bot.
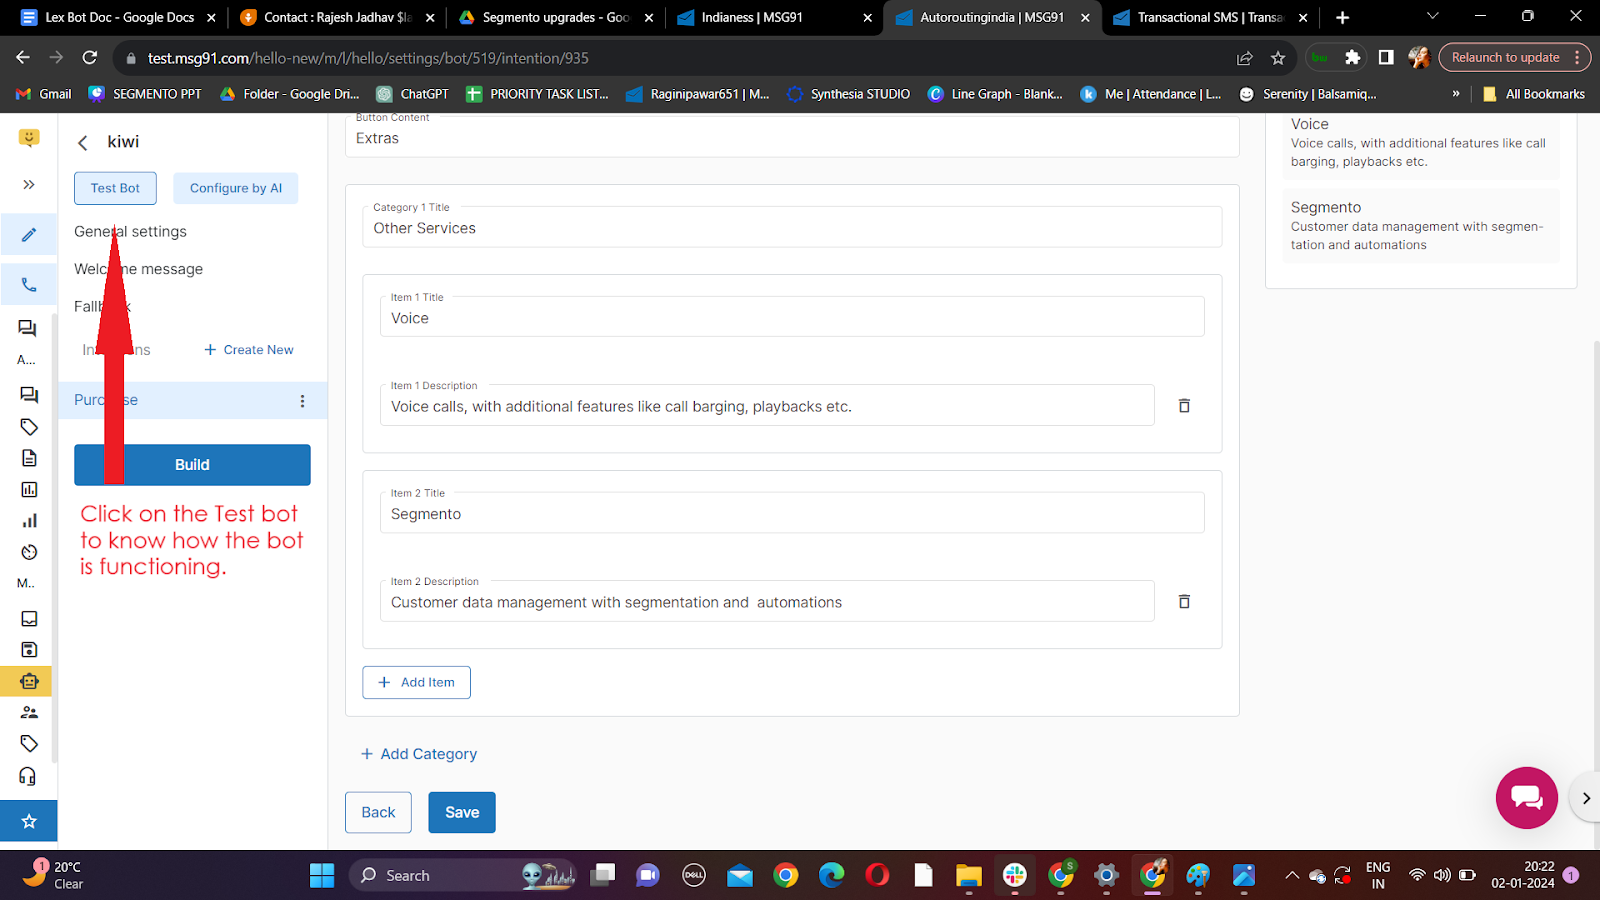
After clicking Test bot button - you can see this type of window and test all the steps of intents and all queries which you have added in the flow.