How to use Push Notifications on MSG91
MSG91 now supports Push Notifications with Hello widgets integrated into your Website.
You can follow the simple steps to implement Push Notifications:
1. Go to MSG91 Dashboard and click on Push Notifications option from there.
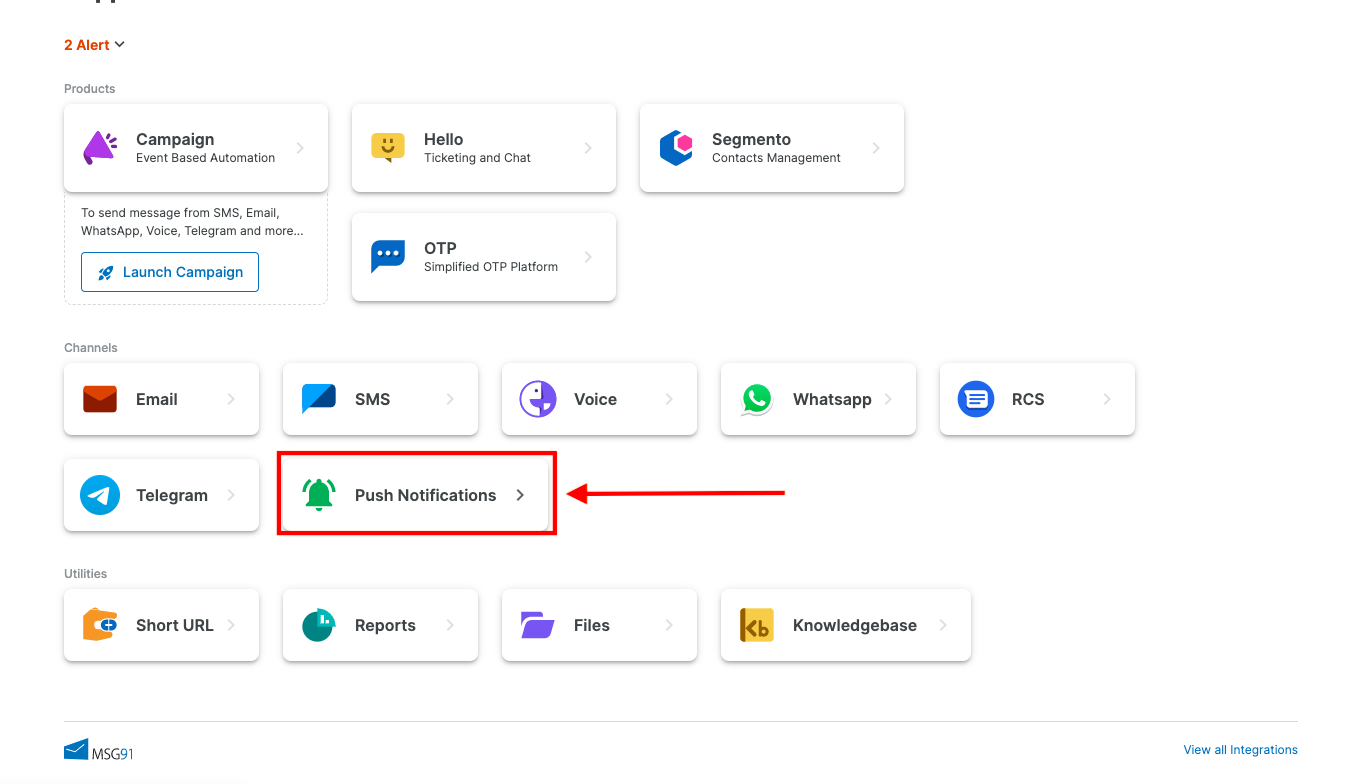
MSG91 Dashboard
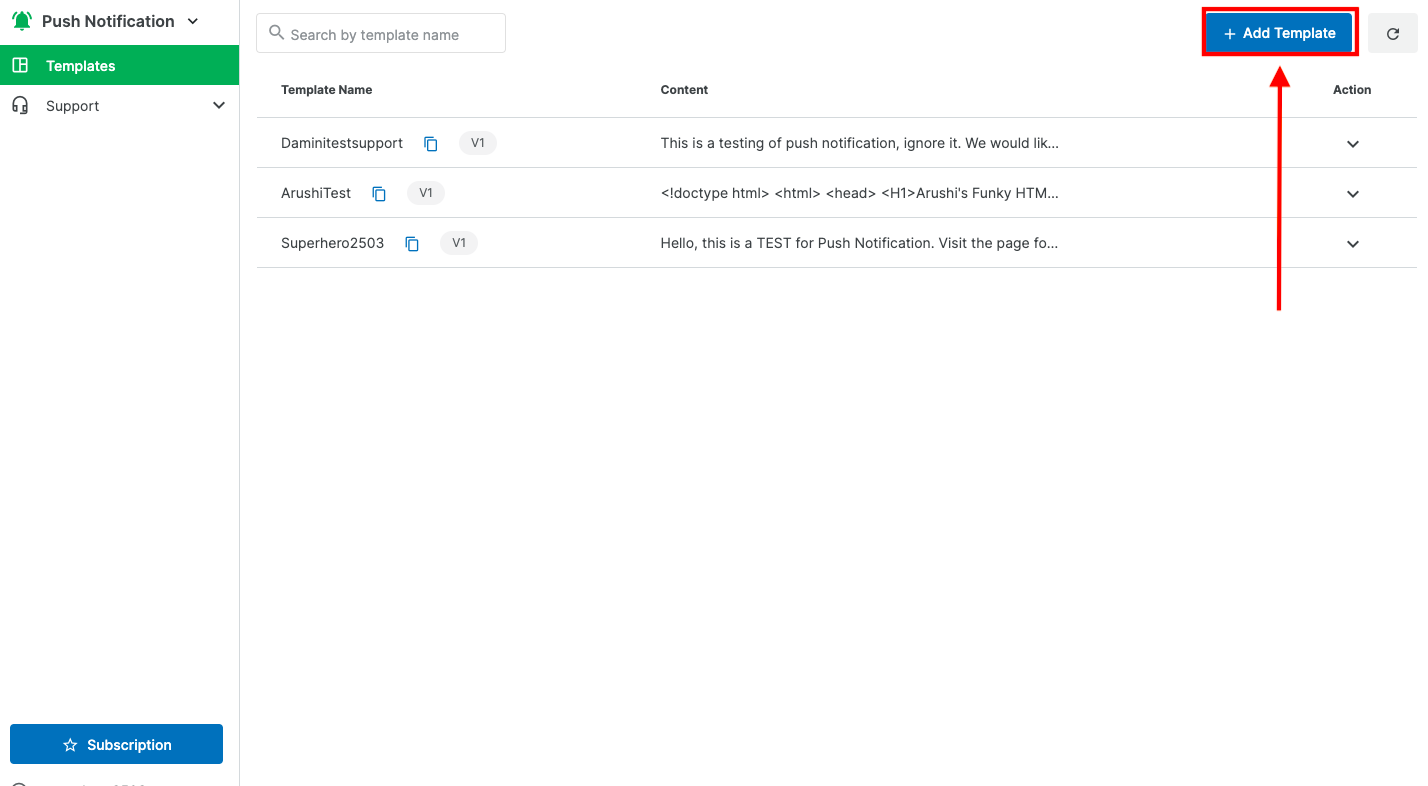
2. Click on the Add template option on the right hand side top corner in order to create a template for the Push Notification.
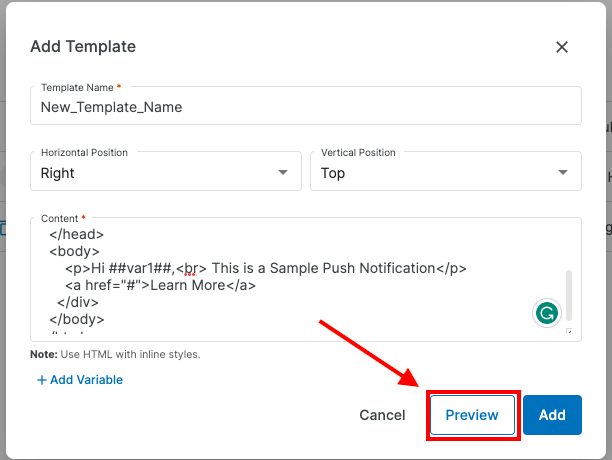
3. Please enter a Template Name and select the position where you want the Push Notification to be displayed. In the content you can enter the text (only in English) or even HTML code with inline styles.
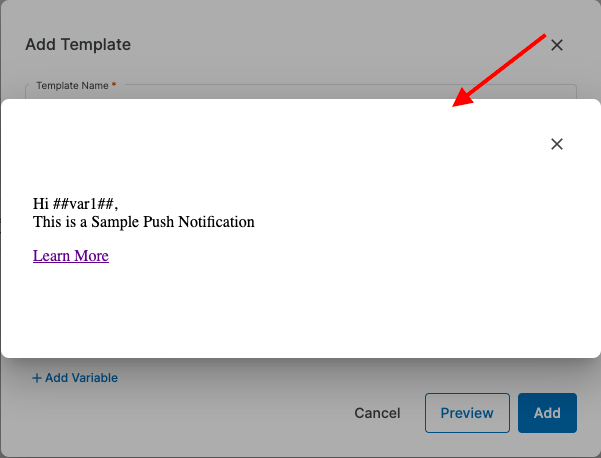
4. You can click on Preview option to preview the push notification template added by you.
5. In order to create a campaign to send Push Notification to your clients, go the campaign option from MSG91 dashboard and then click on New Campaign option on the right hand side corner.
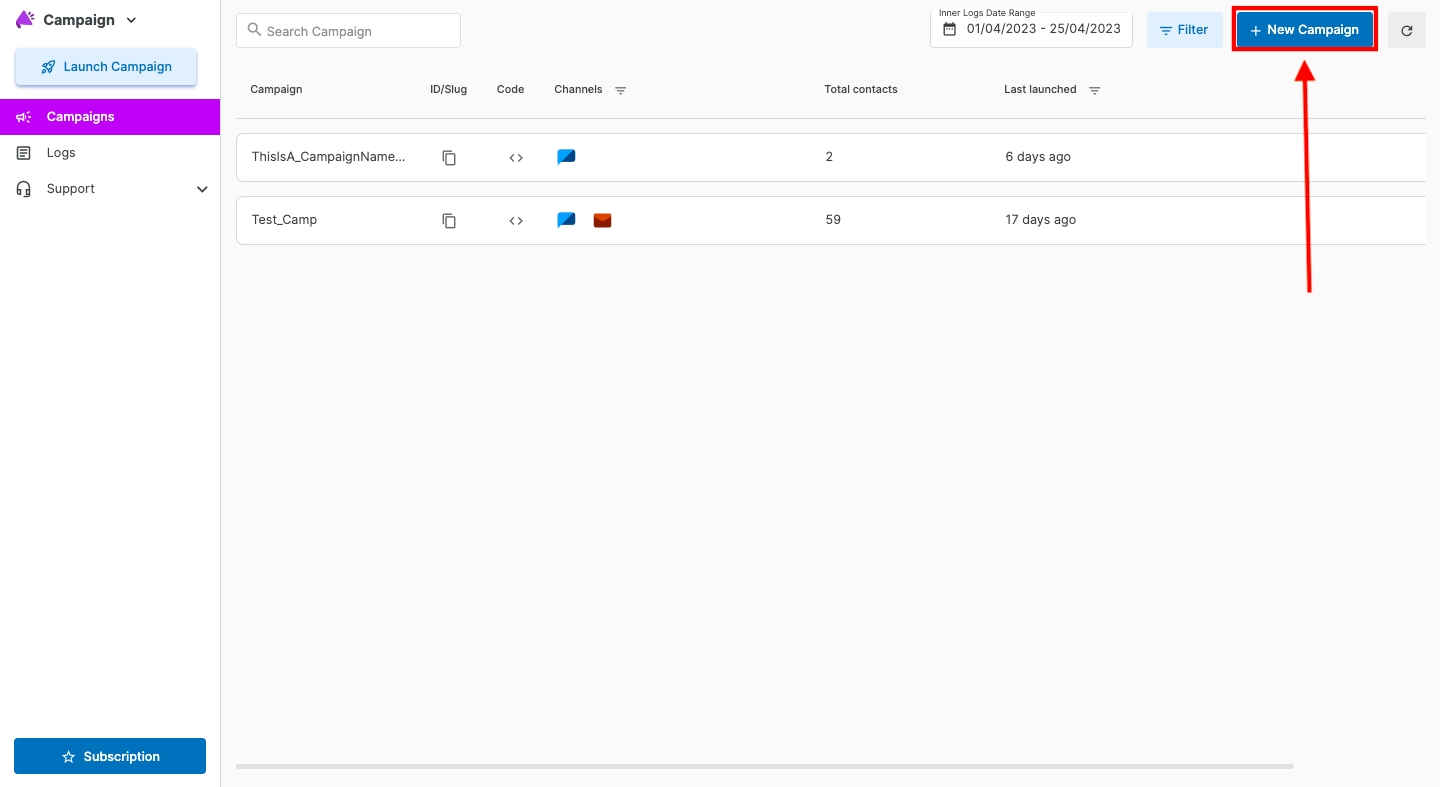
6. Now select create campaign option and enter the campaign name.
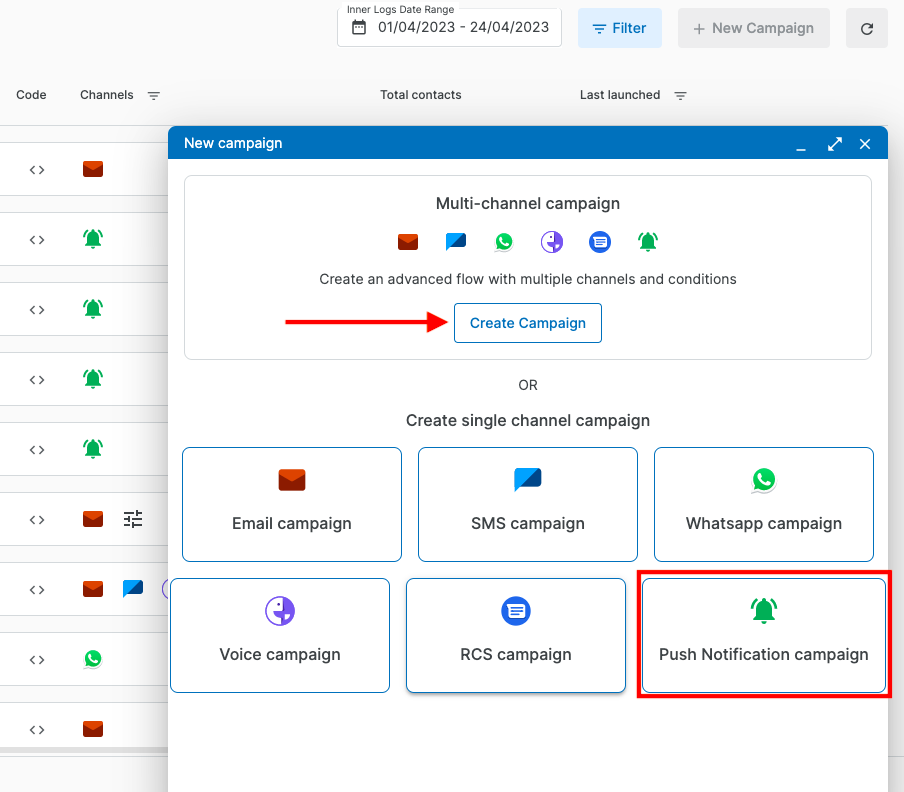
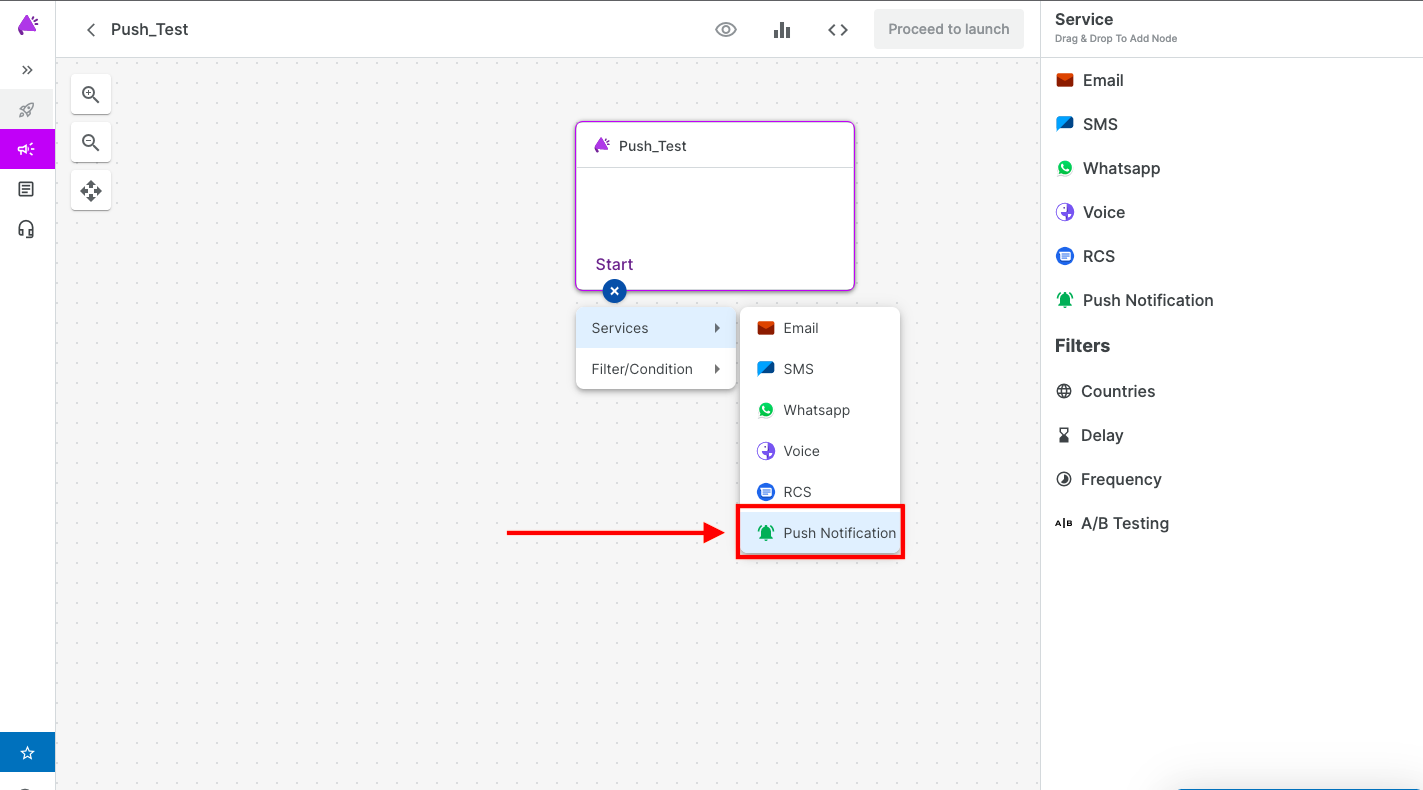
7. Now in the new campaign created you can select Push Notification after clicking on start node as shown in the screenshot below and select Push Notification from there.
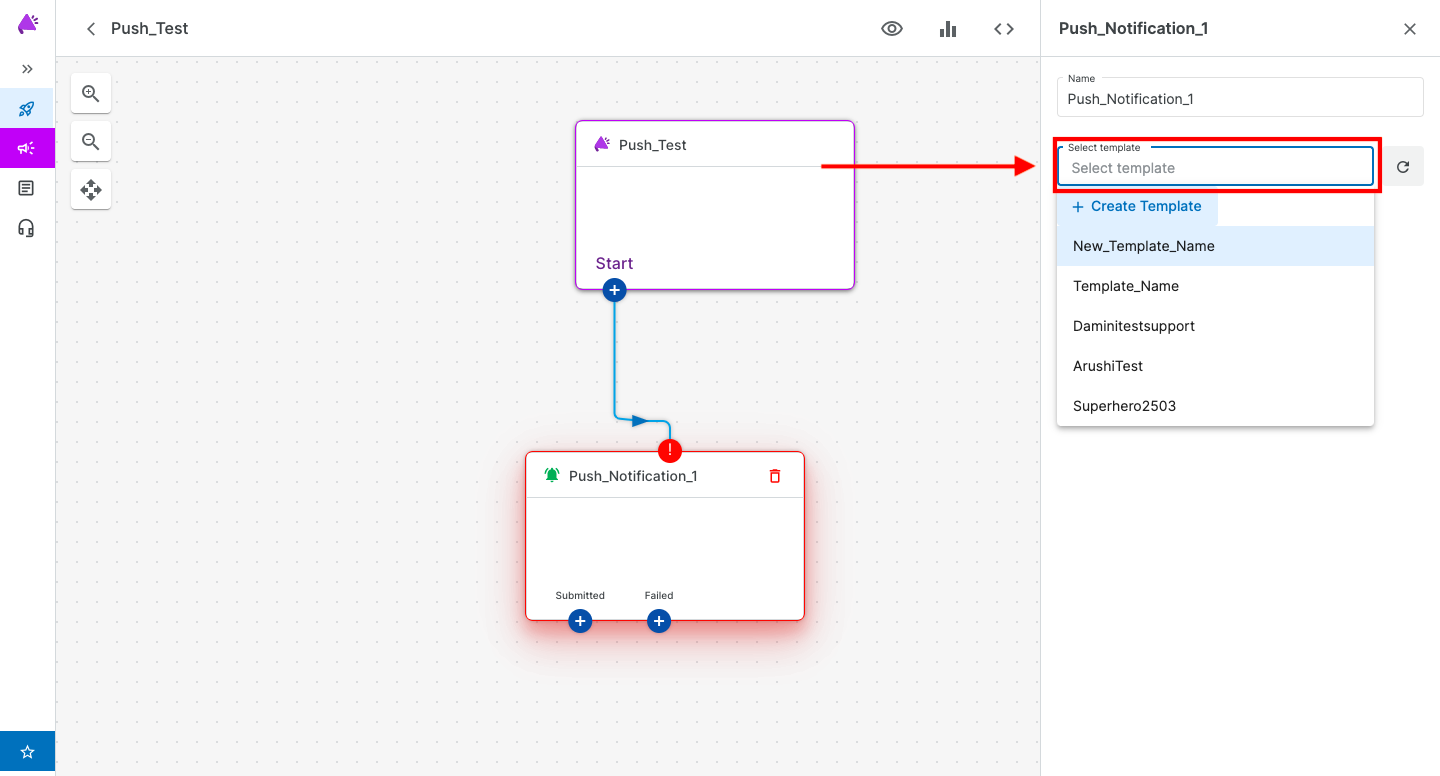
8. Select the template which you created earlier for the Push Notification:
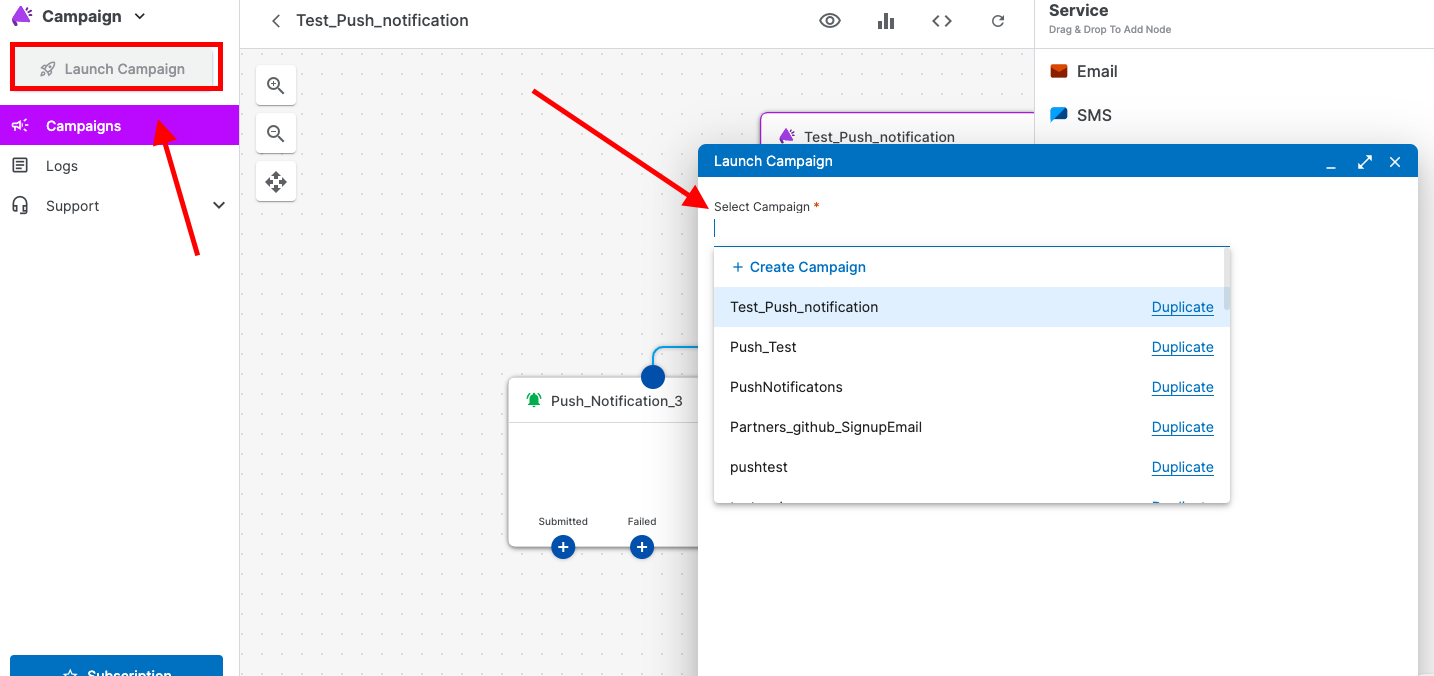
9. Once the campaign is created you can use the launch campaign option to send the push notification to the contacts added in Segmento.
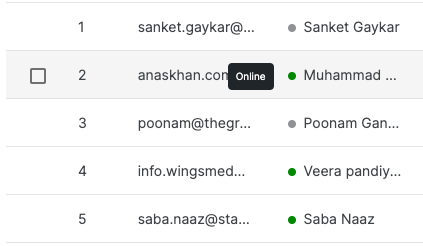
10. Please note that only the end users who are online on your Hello Widget will receive the Push Notification sent by you. You can even see the status of the client who are online from the Segmento section, a green colour icon will appear in front of the name of the client who are online.
Note: Push notification will only work with Hello Widget and that too only on Web Browser.
1663832908583941.png)