1663832908583941.png)
WebEngage RCS Integration through MSG91
WebEngage RCS Integration Using RSP Private Connector
This help document guides you through integrating WebEngage with RCS using the RSP Private Connector. Follow these steps to set up the integration and configure the Webhook for fetching delivery events.
How to Setup the RCS Connector in WebEngage?
Login to WebEngage :- Go to the WebEngage website and log in with your credentials.
Navigate to Integrations :- In the WebEngage dashboard, navigate to Data Platforms > Integrations.
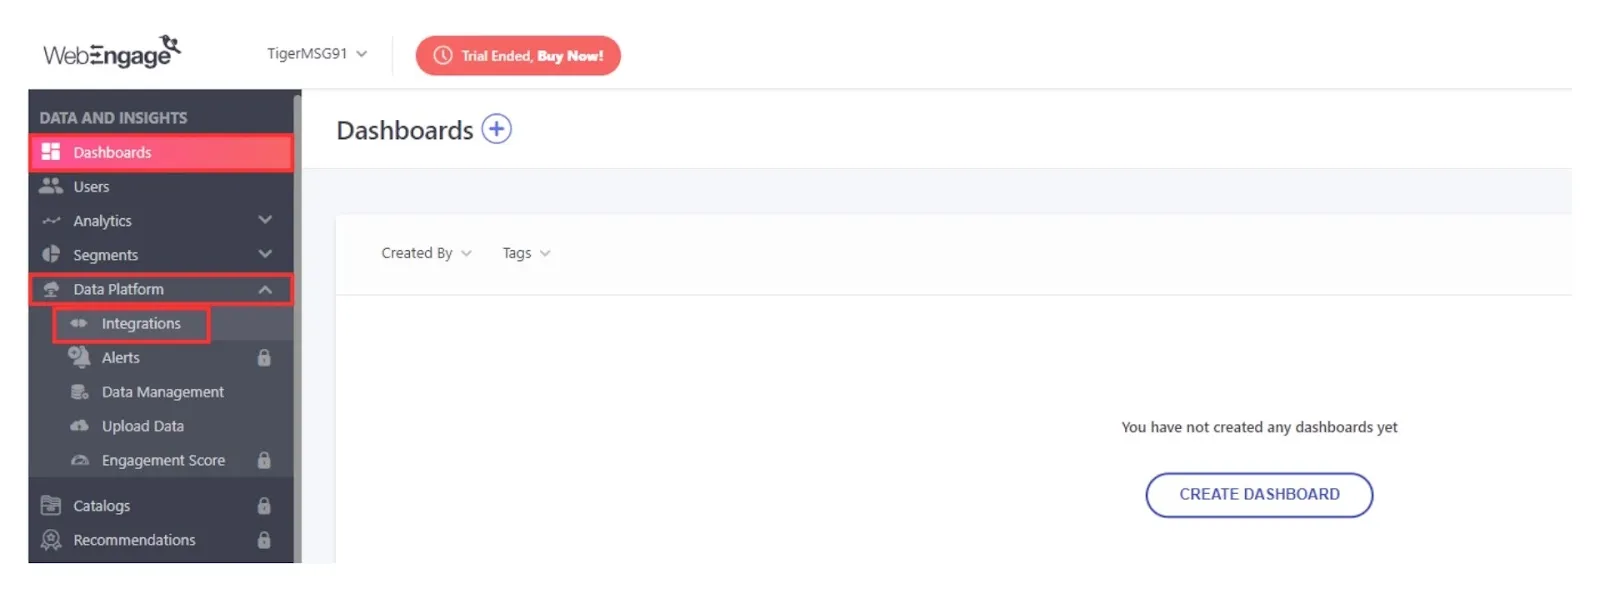
Channel Integration Status :- Click on Configure RCS.

Add Private RSP: Click on Add “Private RSP”

Enter all the details step by step:
Fill in the Configuration Details:-
RCS Service Provider :- Private RSP
Configuration Name :- MSG91 RCS
RCS Business Number :- MSG91 RCS Project ID (How to Get RCS Project Id?)
MSG91 RCS API URL : https://control.msg91.com/api/v5/rcs/send-rcs-message-web-engage/
Add Custom Headers
Custom Headers ( authkey ) :- MSG91Authkey (How to Get Authkey?)
Click on Add RSP Button to save the configuration
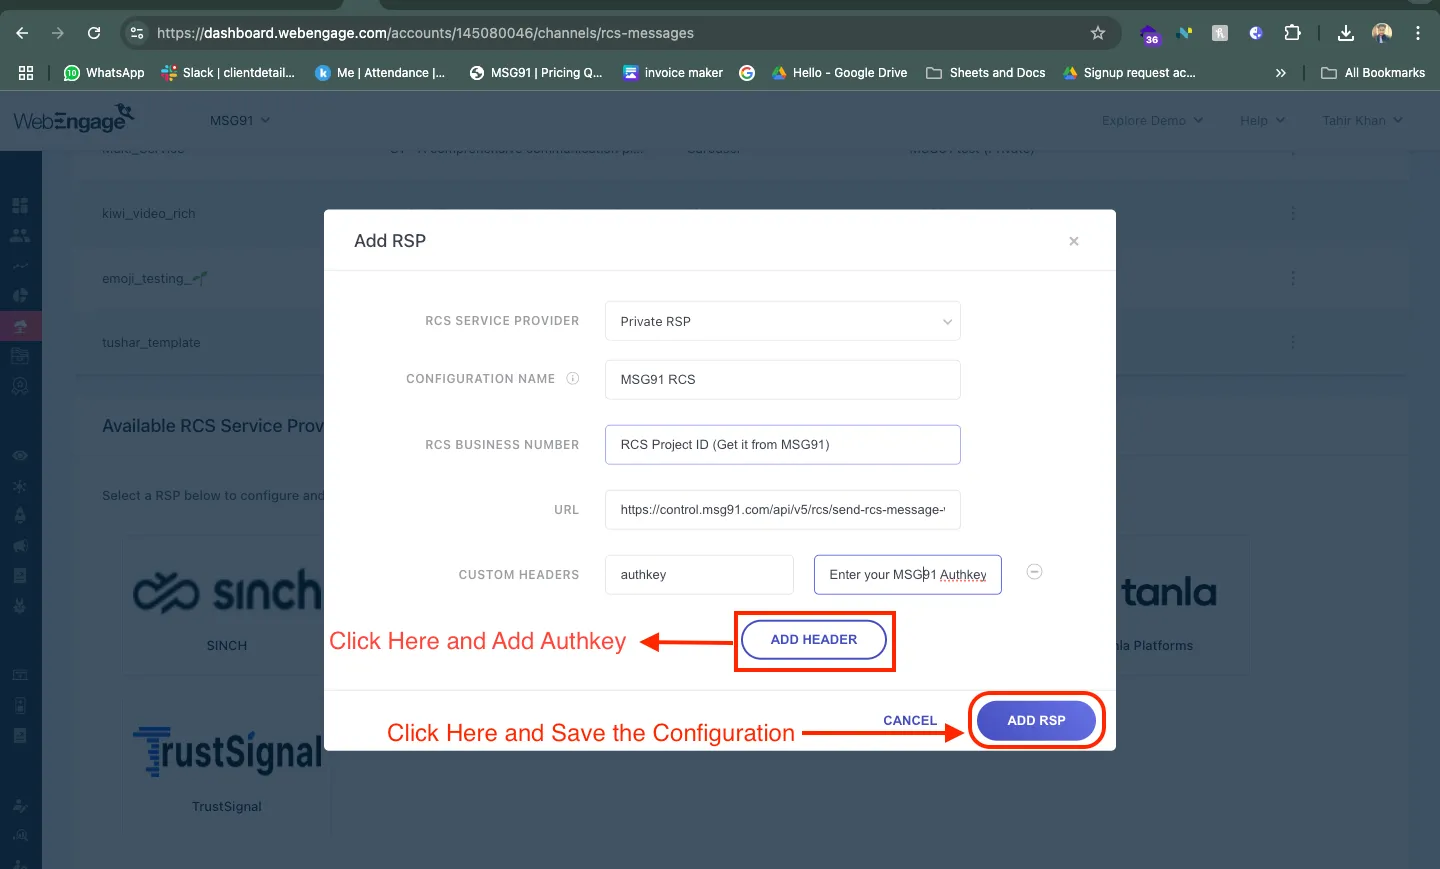
Select Private RSP in RCS Service Provider >> Give a Name to this Connector (i.e. MSG91 RCS) >> RCS Business Number (Enter RCS Project id From MSG91) >> Add MSG91 RCS API URL mentioned above image >> Click on Add Header and Then type “authkey” in First Box and Enter the MSG91 authkey in second box >> Click “Add RSP” Button.
Configuring the Webhook for Fetching Delivery Events
In the WebEngage dashboard, navigate to Data Platforms > Integrations > Configure RCS.
Click on the three dots next to your configured RCS integration and select View Webhook URL.
Copy the displayed URL.

Data Platforms >> Integrations >> Configure RCS >> Click on Three Dots >> View Webhook URL >> Copy the Displayed URL
Now get the WebEngage API Key (Auth Token)

Data Platform >> Integrations >> Rest API >> Click View >> Copy The API Key (WebEngage DSN Auth Token) and keep it with you.
Share both the copied Delivery Webhook URL you copied and the API (DSN Auth Token) with MSG91 support team at [email protected] to enable webengage webhook payload setting in your MSG91 account after that your connector is ready to send RCS messages.
How to Create RCS Template In WebEngage?
Navigate to Integrations :- In the WebEngage dashboard, navigate to Data Platforms > Integrations > Channel Integration Status > Click on Configure RCS. > RCS Templates “+” Button

Data Platforms > Integrations > Channel Integration Status > Click on Configure RCS. > Click on RCS Templates “+” Button.
Add Template: Enter the details of RCS Template Approved on MSG91 and click on Add Template Button on the Right Bottom as shown in below images.


How to run a RCS campaign Via WebEngage?
Navigate to Channels :- In the WebEngage dashboard, Navigate to Channels > RCS > Click on RCS “+” Button+
Navigate to Channels > RCS > Click on RCS “+” Button > Follow the Step by Step instruction as shown in below images.
Step 1: Click on the “+” Button

Step 2: Give Campaign name and select the Target Segment

Step 3 : Save&Continue

Step 4: Select Template and then click on Save&Continue

Step 5 : Test The Campaign and Click on “Save&Continue” (If Received the Test Message)

Step 6: Clcik on the “Launch Campaign” Button

Step 7 : Go to the channels > RCS > Click on the Campaign Name > Overview > Check the Delivery Logs Report.

Go to the channels >> RCS >> Click on the Campaign Name >> Overview >> Check the Delivery Logs Report
Summary:
By following these steps, you will successfully integrate WebEngage with RCS using MSG91's RSP Private Connector. This setup allows you to send personalized messages and track delivery events efficiently. Ensure that all configurations are accurately filled in to avoid any issues with the integration.
Contributors
This section was created by the Partners Team: [email protected]