Building a Multilingual Voice Bot: Step-by-Step Guide
This comprehensive guide provides a step-by-step walk through for creating a powerful, voice-enabled shopping assistant bot. You will learn to integrate the bot with a backend spreadsheet to reliably retrieve product data and, crucially, configure multiple voice tones and languages. This customization ensures your assistant delivers a natural, sophisticated, and globally accessible conversational experience.
Overview
The guide demonstrates the complete process of building an intelligent voice bot that:
Integrates with spreadsheet data sources for real-time product information
Deploys as a voice-enabled bot on WhatsApp and Chat widget
Supports customizable voice tones
And automatically detects and switches between languages with optimized voices
Step 1: Creating the Voice Bot
Log into your MSG91 account and Go to Hello Service
Click on Bots [Auto Reply] from the vertical menu bar.
Create an Agentic AI bot using the create bot button present on the top right corner.
Bot Name: Enter your bot's name (Example: "Myntra")
Type description: Mention the relevant industry and provide description (Example: "E-commerce")
Select the bot type as Agentic AI bot
Click Save to confirm
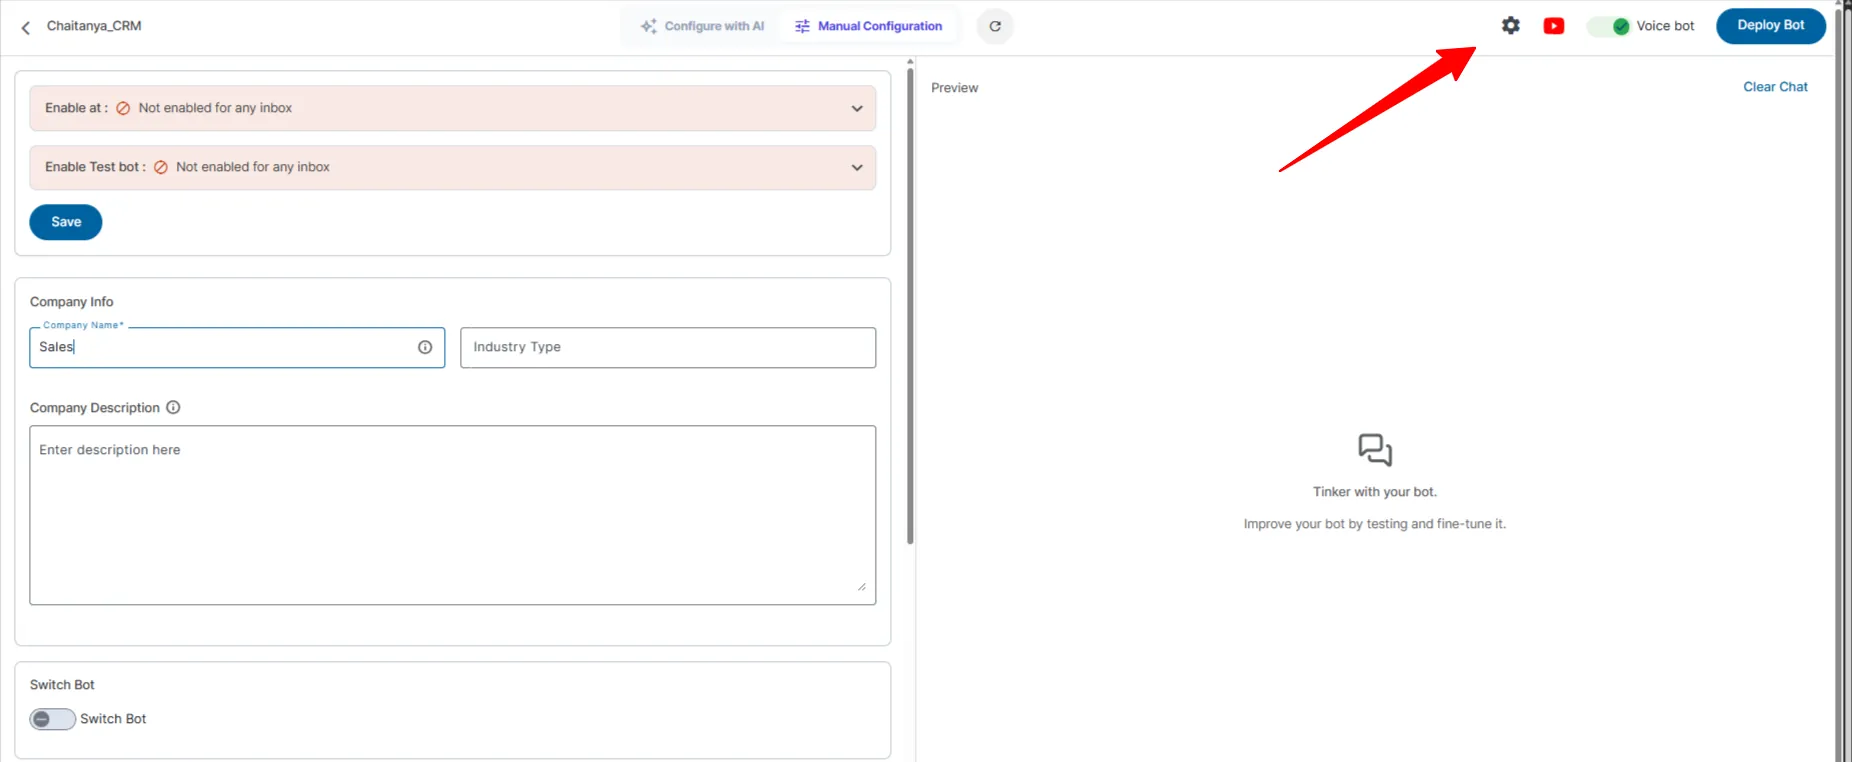
Step 2: Configure your Voice Bot
Enter the Company Name in the relevant field. Example: "Myntra Team".
Specify the Industry Type that best describes the business.
Fill in the Company Description section with a brief overview of the company's purpose or function.
In the Instruction section, provide the prompt or raw instructions for the chatbot. Example: "Prompt + Raw".
Enable the Knowledge Base option to input data through which bot will take reference to respond to the user.
Add Spreadsheet Integration
From the plugins tool, select google spreadsheet plugin and attach sample sheet to it, refer the video on how to attach the spreadsheet (The sheet will contain the information which bot will suggest while providing information to user): How to integrate google sheet with bot
Select your spreadsheet file from the list (Example: "Myntra sale clothes")
Choose the appropriate Worksheet containing your product inventory
Your spreadsheet may contain columns and other details such as: Product Name (e.g., Men's Casual Shirt) , Price,Brand,Size,Color,Available Inventory

Note: The bot will recommend products only from this inventory list and will not go outside of it.
Test Spreadsheet Connection
Click Test to verify the connection
The test should retrieve all products from your spreadsheet
Review the returned data to ensure accuracy
If the test is successful, click Add to integrate the tool with your bot then you will receive an alert on bottom left corner
After that scroll down on same window and click on “ Customize with additional apps and features”
Rename the tool According to data for better clarity
Update the description which describe usecase
This description helps the bot understand the purpose of this data source

NOTE: If you don't have additional knowledge base documents, toggle the Knowledge base section to Off. This ensures the bot responds only with information from the connected spreadsheet
Step 3: Select channel and Enable the Voice Bot
Within the Agentic AI bot, go to the Enable at section
Select WhatsApp or any other channel to activate the bot on, here we have taken WhatsApp as an example
Select the phone number in this case where the bot will operate (As shown in example)
Click Save

5. Then Turn the toggle Voice Bot to On
6. This enables voice interaction capabilities for your bot
7. Click Deploy to launch the bot
Test the Voice Bot
Initiate a voice call with the bot using the configured phone number
Test with sample queries such as:
"What can I wear to a beach party?"
"I'm looking for men's shirts"
Verify that the bot:
Retrieves product information from the spreadsheet
Presents relevant products based on the query
Responds appropriately to follow-up questions
Ends the call when requested
Example Voice Conversation:
User: "What can I wear to a beach party?"
Bot: "For a beach party, you'd want something light, comfortable and stylish. Let's see what's in our inventory. A women's maxi dress in peach from Forever New for 1,799 rupees would be a fantastic choice."
User: "No, for man. I'm looking for the man."
Bot: "We have a men's casual shirt in blue from H&M for 1,299 rupees, which would be great for a more laid-back look."
You can mute incoming WhatsApp voice calls by using the “Mute Ringing” option. Once activated, this setting will silence all incoming WhatsApp calls on your device.

Step 4: Settings For Change or Set the Voice Tone With Multiple languages In Voice Bot
You can Find the Settings near to the option of voice bot.
The Voice Bot Configuration screen allows you to configure the Text-to-Speech (TTS) settings for your voice bot.
You can choose between the following TTS providers:
Indian Languages – Supports major Indian languages such as Hindi, Telugu, Tamil, Marathi, Gujarati, and other regional languages.
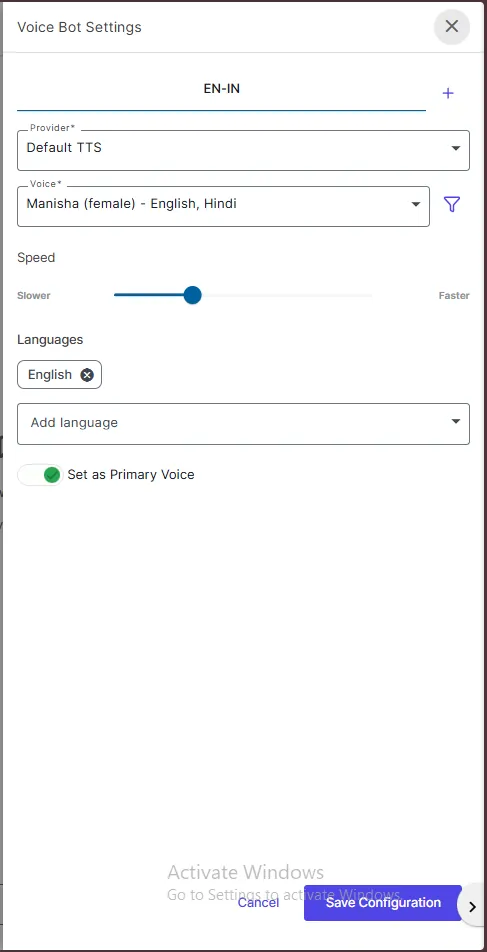
International Languages – Supports international languages and voices, including English (United States), Spanish, Polish, Romanian, Portuguese, Slovak, German, and more.
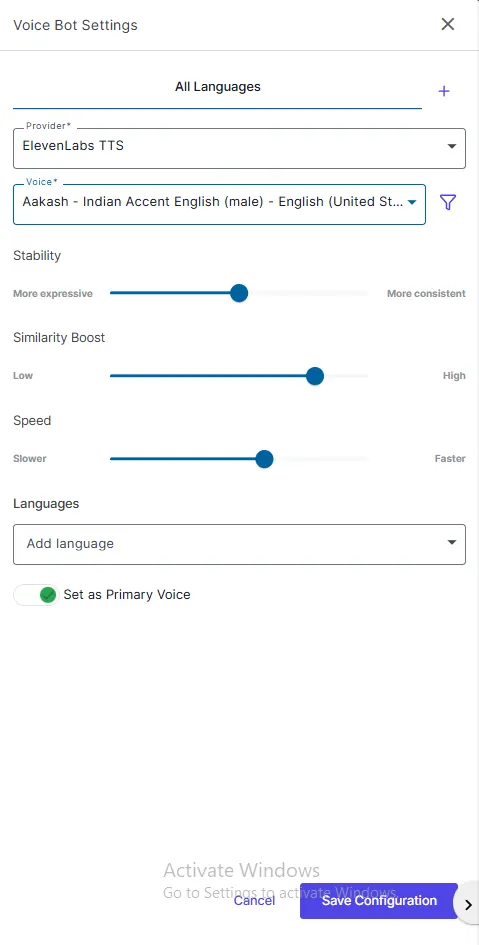
Voice Selection
Select the preferred voice from the available voice list based on the chosen provider.
Example: Manisha (Female) – Hindi , English.
Speed
Adjust the speech speed using the slider.
Move left for slower speech and right for faster speech.
Languages
Select one or more languages supported by the chosen voice.
Use the Add Language option to add additional languages.
Set as Primary Voice
Enable this option to make the selected voice the default voice for the bot.
Save Configuration
Click Save Configuration to apply and save the voice settings.