How to Integrate your MSG91 Store with your Shopify store
You can integrate MSG91 with your Shopify store to send SMS, Emails, and WhatsApp to your customers via a plugin on targeted event conditions like:
Abandoned Cart
Abandoned Checkout
New Customer
New Order
Update Order
Order Paid
Cash On Delivery
Order Cancelled
Order Partially Fulfilled
Order Fulfilled
Create Order Transaction
Create Refund
Out For Delivery
Delivered
You can watch this video or follow the below steps.
1. Open your Shopify store. Go to the Apps section from the sidebar and search for msg91.


2. Select MSG91 from the app search results.

3. Select the Add App option.

4. It will be added to your Shopify store. Click on the install app option to use it.

5. If you are a new user, you can signup from the link given.

6. If you already have a MSG91 account, go to the campaign section and create a campaign first with the required communication channels. Refer to this guide on how to create a campaign.
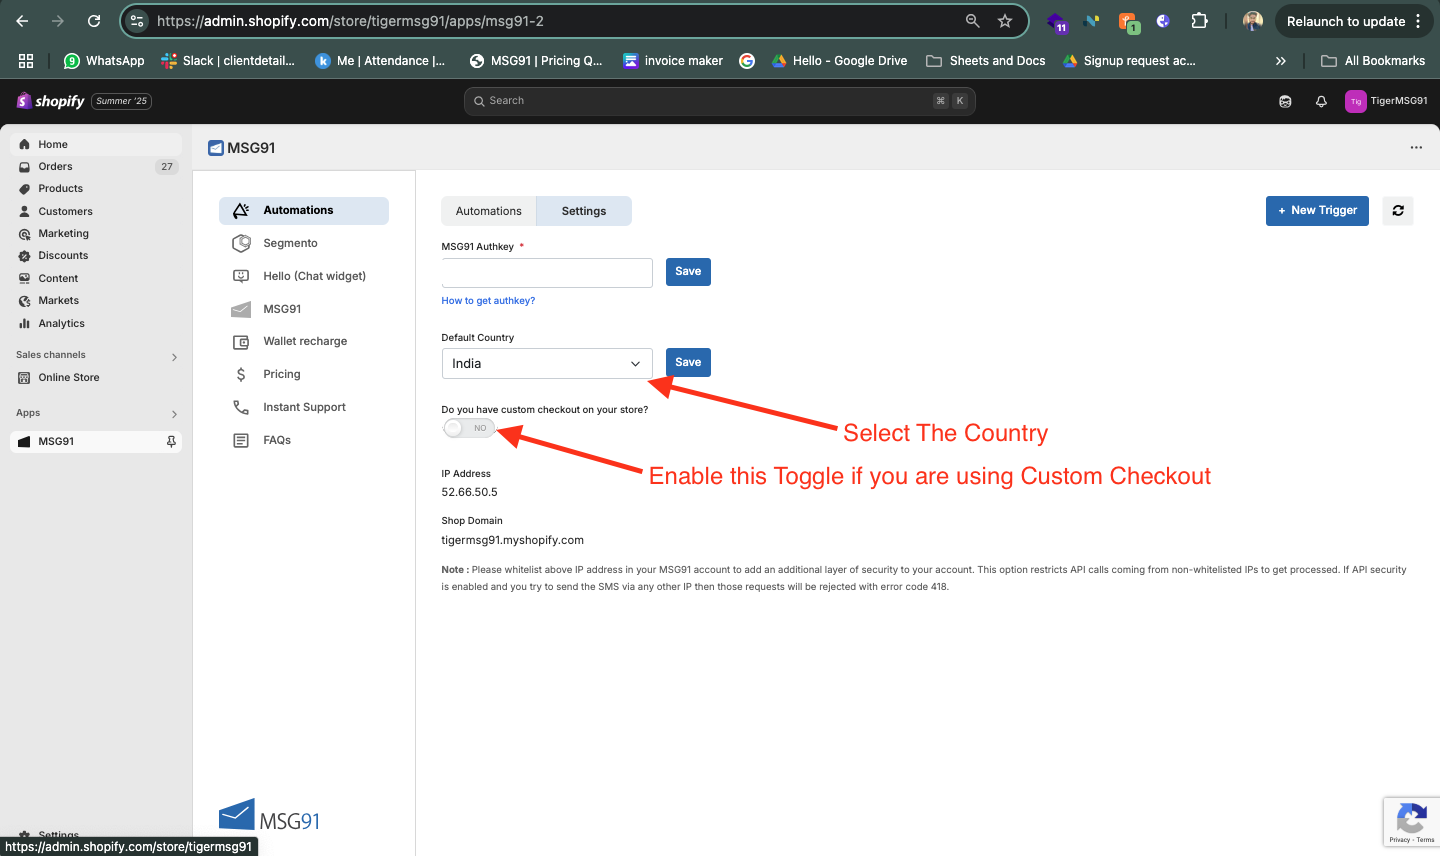
Once done, come back to your Shopify store. In the Automation settings section, click on the get your Authkey option which will direct you to your MSG91 account’s authkey section. Copy the auth key and paste it in there. Click on the Save button.

7. Once it's verified, it will direct you to the Triggers page. Click on the New Trigger button to create a trigger.

8. Give the name of the trigger and select the status. In the Campaigns column, it will show you all the campaigns created in your MSG91 account. Select one as per the trigger. Then select the relevant Shopify event.

9. According to the steps of the campaign selected by you, enter the recipient's contact details in the Send To field. You can also add a custom email or phone number to it. Add CC or BCC, if required. Then map the variables specified in the campaign content with the Shopify variables and Save the trigger.

10. Now, switch to the Hello section in Shopify if you wish to integrate the chat widget on your website.

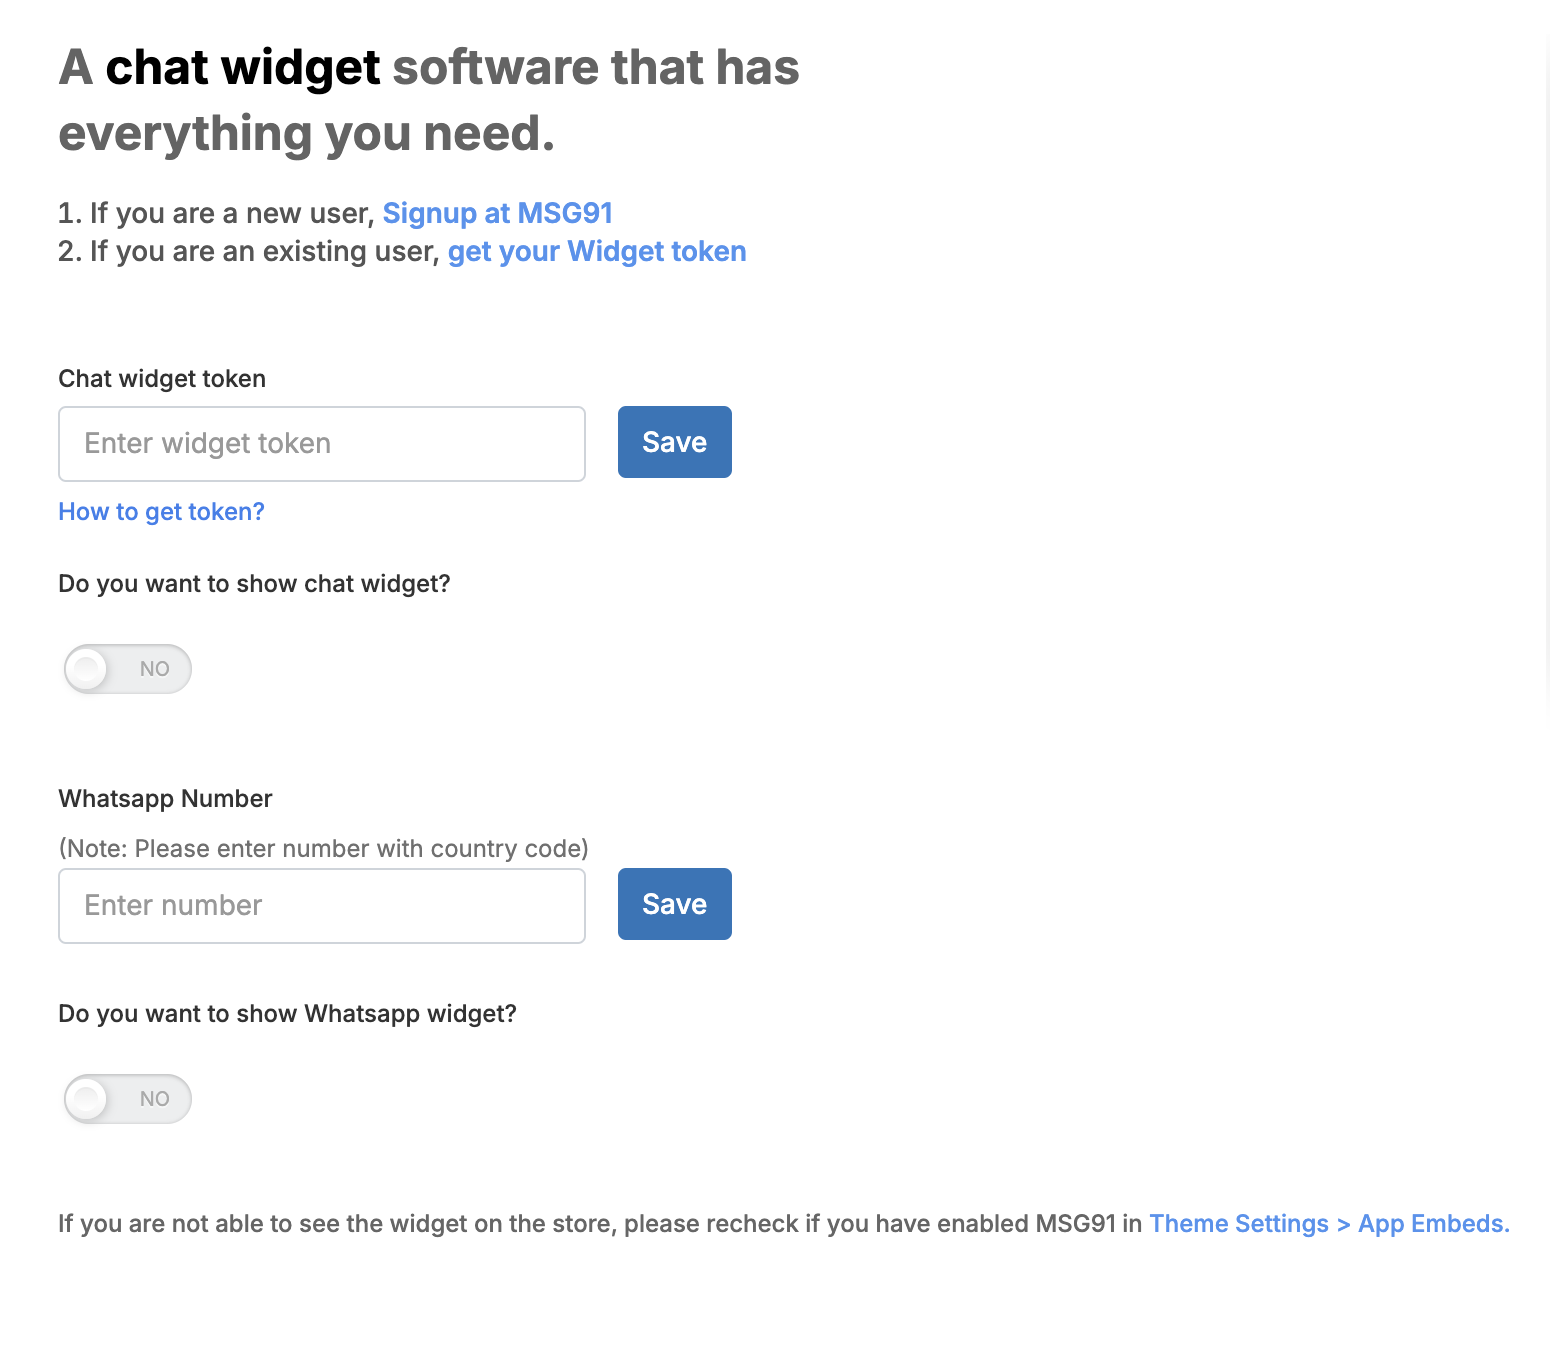
11. Click on the How to get token? It will direct you to the Chat widget settings of your MSG91 Hello panel. Copy the widget token from the script on the right side and paste it here. Click on the Save button to verify the token and enable the toggle below to show the widget on the website.


Note: If you have multiple chat widgets, you can go to the All inboxes section and select Chat from the dropdown, click on the 3 dots of the desired chat widget, and select the widget —> Integration, and here is the option to copy the token.


12. To integrate WhatsApp chat on your website, enter the active WhatsApp number along with the country code as integrated into your MSG91 account.
Click on the Save button and enable the toggle below to show it on the website.
13. Once saved, click on the view option on the online store in the sidebar to see the widget.

14. You will see an arrow at the bottom right of the page. Clicking on it will give the WhatsApp and Chat widget options.

If the widget doesn't show on the page, it might be because the MSG91 app isn't embedded in your theme. To do so,
a. Select the Online Store option from the sidebar. Select Themes inside it and click on the Customize button on your current theme.

b. Go to the App embeds tab from the left sidebar and turn on the MSG91 toggle, if off. Then, click on the Save button.

View your page again as it should show the Chat widget and WhatsApp chat now.